
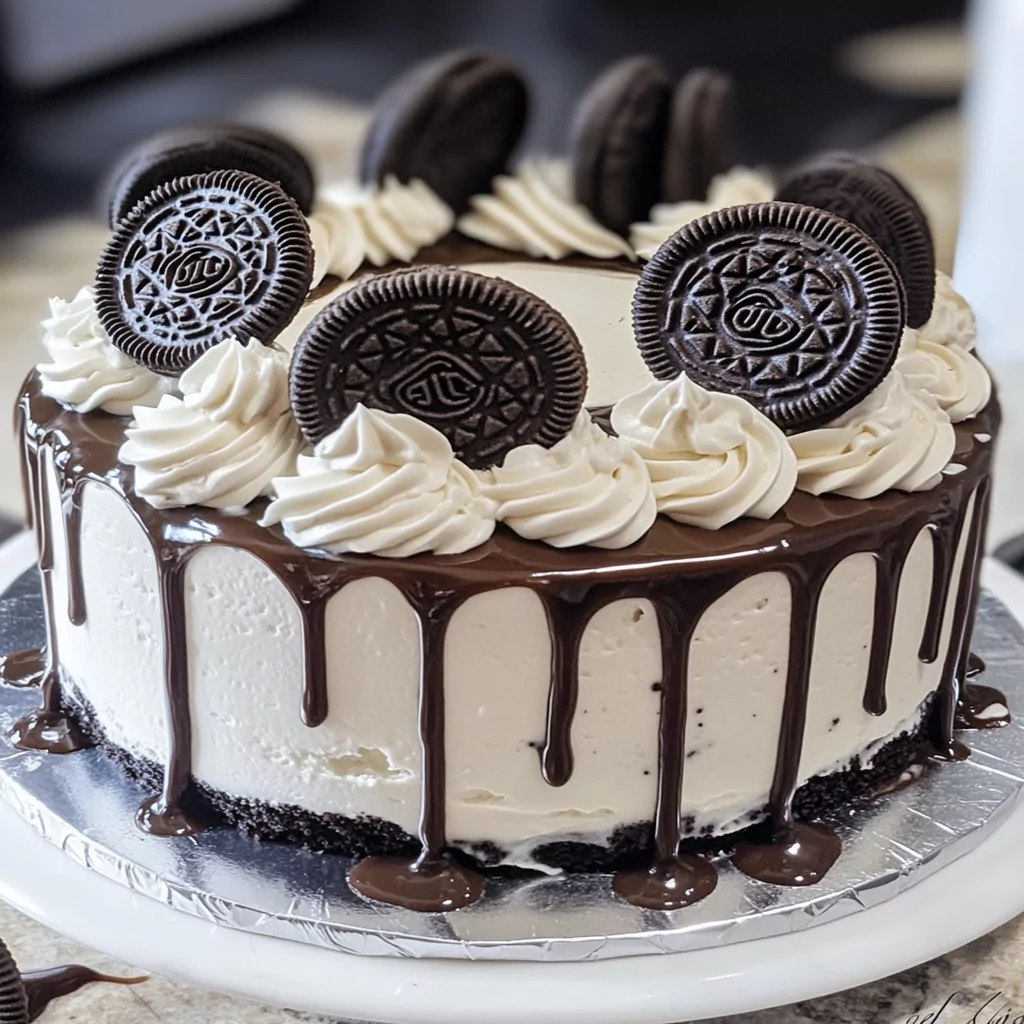
If you’re searching for a dessert that combines the creamy delight of ice cream with the rich crunch of Oreos, look no further than this decadent Oreo Ice Cream Cake. This no-bake treat is incredibly easy to prepare and perfect for warm weather gatherings. Picture layers of creamy ice cream nestled between crunchy Oreo cookies—it’s a dessert that will make any celebration feel extra special.
In this article, we’ll take you through every step of creating your own stunning Oreo Ice Cream Cake. Using simple ingredients such as cookies, ice cream, and whipped topping, you can whip up this show-stopping dessert in no time. Not only is this cake visually appealing, but it also delivers a deliciously satisfying taste with each bite. Whether you’re hosting a birthday party or just want to enjoy something sweet at home, this recipe will surely impress family and friends alike.
Plus, making an Oreo Ice Cream Cake is incredibly adaptable! You can customize the flavors by choosing different types of ice creams or adding your favorite toppings. Prepare to dive into a world of flavor and texture as you learn how to make this beloved dessert that promises to be the highlight of any meal.
Main Ingredients
Oreo Cookies
Oreo cookies are the star ingredient in this recipe. You’ll need approximately 24 Oreos for the crust and decorations. The chocolate wafer cookies provide a crunchy base that complements the creamy filling beautifully. If you’re feeling adventurous, consider using double-stuffed Oreos for an extra layer of creaminess.
Ice Cream
You’ll need about 1.5 quarts (6 cups) of your favorite ice cream flavor. Vanilla is classic and pairs well with Oreos, but feel free to use chocolate or cookies and cream if you prefer something more indulgent. Make sure your ice cream is softened slightly before using; it should be scoopable but not melted.
Whipped Topping
A tub of whipped topping (about 12 ounces) adds lightness and fluffiness to your cake. Whipped topping is easy to use and eliminates the need for complicated whipping techniques at home. It spreads easily over the ice cream layers while giving your cake a lovely finish.
Chocolate Syrup
Chocolate syrup adds an extra layer of sweetness and flavor to your cake. You can drizzle it between layers or use it as a topping when serving for added decadence. A standard bottle (about 12 ounces) should suffice for both decoration and drizzling.
Optional Toppings
Consider additional toppings like crushed Oreos, sprinkles, or chopped nuts to enhance both flavor and presentation. These toppings add texture and visual appeal while allowing you to customize your creation further!

How to Prepare Oreo Ice Cream Cake
Step 1: Prepare the Cookie Crust
Begin by crushing approximately 24 Oreos into fine crumbs using either a food processor or by placing them in a sealed plastic bag and crushing them with a rolling pin. You want these crumbs to resemble sand—fine enough that they can hold together but not too coarse that they don’t bind well. Once crushed, combine the crumbs with melted butter; about 4 tablespoons should do the trick! Mix until all crumbs are evenly coated in butter.
Next, press this mixture firmly into the bottom of a 9-inch springform pan. Use your fingers or the bottom of a measuring cup to ensure an even layer across the base. This crust will serve as the foundation for your ice cream layers! After pressing down firmly, place it in the freezer while you prepare the filling—this helps it set better.
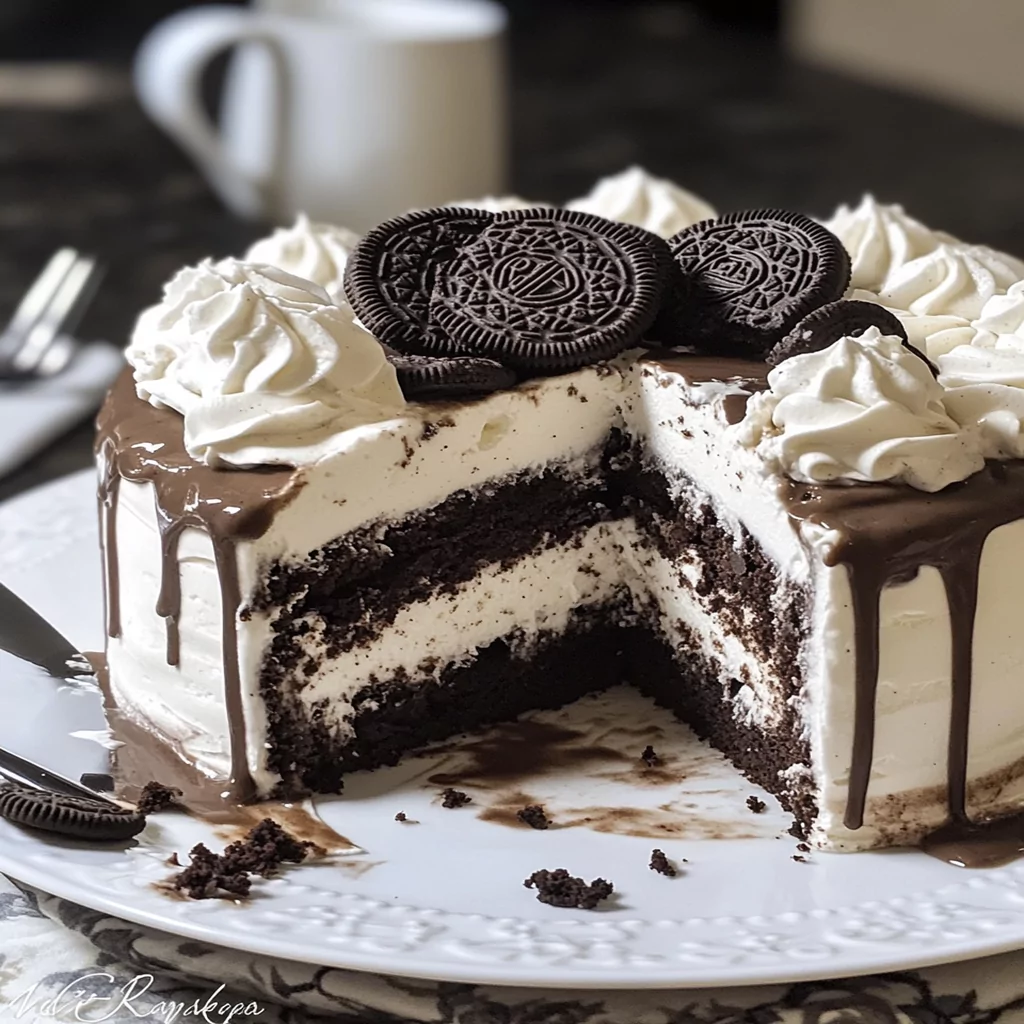
Step 2: Add Your First Layer of Ice Cream
Once your crust is set after about 10 minutes in the freezer, it’s time to add your first layer of ice cream! Take approximately 3 cups of softened vanilla (or chosen) ice cream and spread it evenly over the crust using a spatula. Make sure it’s smooth on top; this helps create clean layers later on! For best results, let this layer sit at room temperature for about 5 minutes before putting it back into the freezer again—this allows it to firm up slightly before adding more ingredients.
Afterward, return it back into the freezer for about 30 minutes so that it can freeze solid before moving onto the next layer! This ensures each layer remains distinct when slicing through at serving time.
Step 3: Incorporate Whipped Topping
Once your first layer has firmed up nicely after freezing for half an hour—you’re ready to add whipped topping! Using roughly half (6 ounces) of whipped topping from an entire tub will create a delightful contrast against both chocolate cookie layers beneath as well as future flavors above!
Spread this topping evenly over your frozen layer using either spatula once again—or if desired—a piping bag fitted with any decorative tip gives fun flair too! Afterward sprinkle some crushed Oreos on top for added texture; they’ll look beautiful against white whipped frosting too! Return everything back into freezer once more while preparing final sections ahead…
Step 4: Finish With More Ice Cream Layers
Now comes another generous scoop (around 3 cups) from remaining softened vanilla-flavored goodness—gently spreading across previous toppings like frosting on cake would go! Ensure coverage stays even throughout ensuring none gets missed out on celebrating its deliciousness later!
After smoothing things out with spatula again—you may optionally drizzle some chocolate syrup across surface area just prior sealing off last round towards completing whole masterpiece here… Cover tightly with plastic wrap ensuring air doesn’t spoil delectable experience later down line during cooling process needed!
Freeze entire assembled dessert overnight—or at least six hours—to allow all layers achieve optimal firmness resulting in beautifully crafted slices ready when guests arrive hungry wanting nothing less than perfection served right there at table waiting eagerly!
Serving and Storing Tips
Serving Suggestions
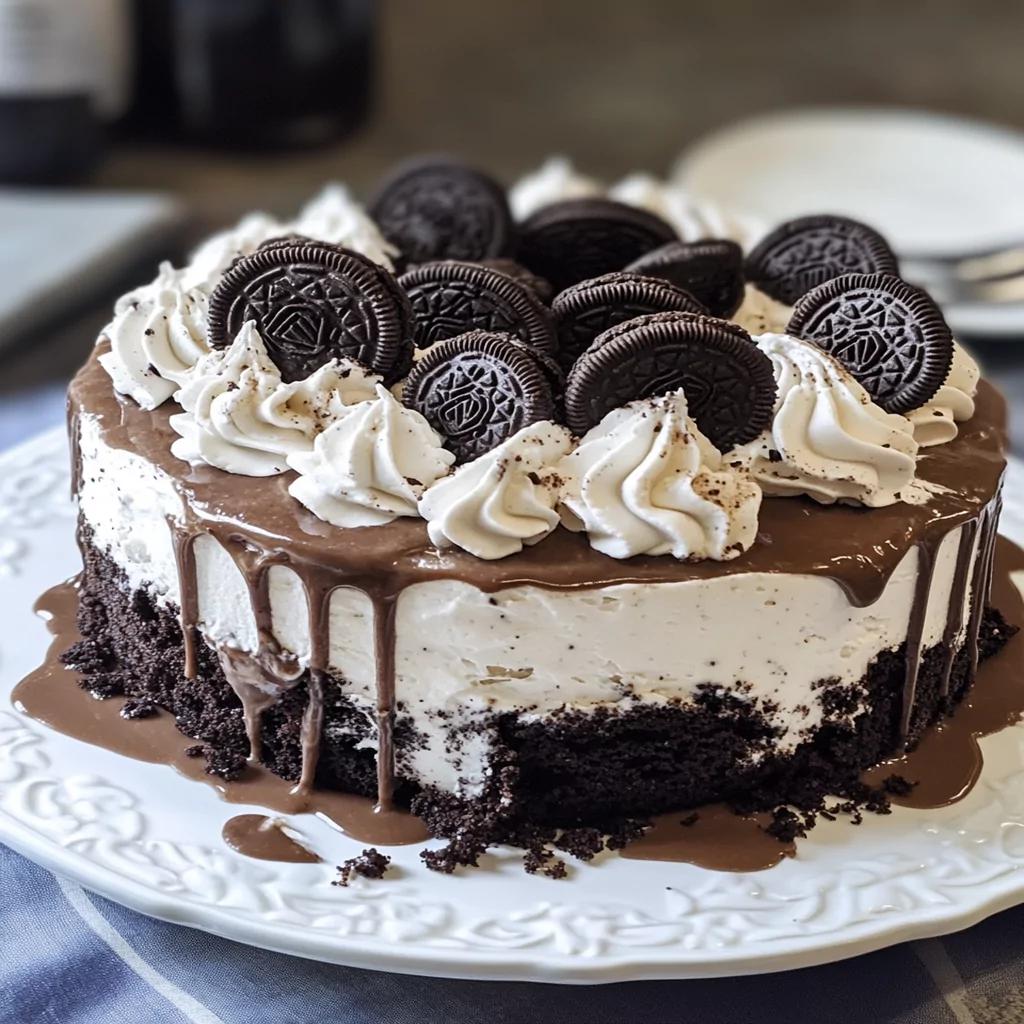
When ready to serve your scrumptious Oreo Ice Cream Cake, remove it from the freezer about 10 minutes beforehand; allowing slight softening will enable easier slicing without compromising structural integrity significantly!
Use a hot knife dipped briefly under warm water before cutting slices ensures cleaner edges rather than jagged parts breaking away during attempts made earlier without proper preparation leading messy presentation instead overall desired expectations set forth initially herein highlighted![a] Serve each slice adorned optionally topped with additional whipped topping drizzled chocolate syrup along side few whole pieces remaining nearby acts decoration bringing smiles joy all around table where everyone gathers celebrating occasion together!
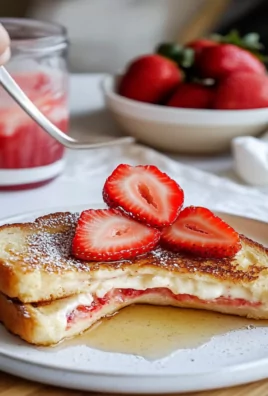
Consider pairing slices alongside fresh fruit like strawberries blueberries offering vibrant color contrasts brightening up platters full delights awaiting eager guests appreciate full range flavors within gathering atmosphere created lively conversations shared around dessert being focal point evening’s festivities together lovingly enjoyed amongst friends family alike…
Storing Leftovers Properly
If there happen leftovers after festivities subside—you may want preserve their freshness keeping them safe longer term without spoilage ruining experience altogether down road ahead… Wrap any remaining portions securely utilizing plastic wrap ensured tightly covering surface areas preventing exposure air influences which causes melting issues arise unexpectedly ruining pieces meant savored still remaining behind untouched originally planned earlier intended enjoyment throughout week ahead instead!
Mistakes to avoid
One common mistake when making an Oreo Ice Cream Cake is not allowing your ice cream to soften before layering. If the ice cream is too hard, it won’t spread evenly, leading to uneven layers. To avoid this, let the ice cream sit at room temperature for about 10 to 15 minutes before you start assembling your cake. This little wait ensures a smoother texture and easier spreading.
Another mistake is using too much filling between layers. While it’s tempting to load up on delicious ingredients, too much can cause the cake to collapse or become overly soggy. Aim for a balanced amount; typically, one cup of filling between each layer is sufficient. This will give you that perfect creamy texture without compromising stability.
Forgetting to line your pan with parchment paper can also lead to disaster. Without this step, you risk having your cake stick to the sides of the pan, making it nearly impossible to remove without breaking. Always line the bottom and sides of your pan with parchment paper before pouring in your layers. This ensures easy release and keeps your Oreo Ice Cream Cake intact.
Lastly, don’t skip the chilling time after assembling your cake. Many people are eager to dig in right away, but letting it chill for at least four hours—or overnight—allows the flavors to meld together beautifully and helps the cake set properly. Skipping this step can result in a mushy dessert that doesn’t hold its shape when served.
Tips and tricks
To create a stunning Oreo Ice Cream Cake, consider using different flavors of ice cream for each layer. Mixing classic vanilla with cookies and cream or mint chocolate chip can add delightful complexity to your dessert. Not only does this make each slice visually appealing, but it also introduces various flavors that complement the Oreos perfectly.
Another helpful tip is to crush some Oreos for garnishing on top of the cake. A sprinkle of crushed cookies not only enhances visual appeal but also adds an extra crunch that elevates the dessert’s texture. Simply crush them in a resealable bag and then sprinkle over whipped cream or melted chocolate topping for a refined finish.
When mixing whipped cream into your ice cream mixture, fold gently rather than stirring vigorously. Overmixing can deflate the whipped cream, which results in a less fluffy texture for your cake layers. Folding helps maintain that airy quality while still combining all ingredients well.
Consider using a springform pan if you’re looking for easier assembly and removal of your Oreo Ice Cream Cake. The removable sides allow for clean separation from the cake without damaging its structure. This type of pan gives you confidence when presenting at parties or gatherings since it creates a beautiful shape that stands out.
Finally, always have fun experimenting with additional toppings like chocolate syrup or fresh fruit when serving slices of your cake. These small touches can turn an already delicious dessert into an unforgettable experience for guests!
Suggestions for Oreo Ice Cream Cake
When preparing an Oreo Ice Cream Cake, consider incorporating various textures by adding layers of fudge sauce or caramel between ice cream layers. These additions provide sweetness and richness while contrasting nicely with the crunchy Oreos and creamy ice cream. Just ensure these sauces are not overly liquidy; otherwise, they may seep through and make the cake soggy.
Using homemade whipped cream instead of store-bought can elevate your dessert significantly. Homemade versions usually taste fresher and allow you more control over sweetness levels and flavorings like vanilla extract or cocoa powder. Whipping heavy cream until soft peaks form creates a light volume that complements both ice cream and Oreos beautifully.
Experiment with different brands of Oreos as well! While classic Oreos are fantastic, there are many flavors available now such as birthday cake or mint variations that could add exciting elements to your cake’s flavor profile. Mixing different types can surprise guests with new tastes they didn’t expect from such a simple dessert.
Remember that presentation matters! When serving the Oreo Ice Cream Cake, slice it neatly using a sharp knife dipped in warm water for smooth edges without crumbles falling apart everywhere on plates around it! Serve alongside elegant garnishes like fresh mint leaves or even edible flowers for added sophistication during special occasions.
Lastly, don’t forget about dietary restrictions! Consider offering dairy-free ice creams made from almond or coconut milk if you have guests who may be lactose intolerant or vegan-friendly options as well so everyone can enjoy this treat together!
FAQs
What is an Oreo Ice Cream Cake made of?
An Oreo Ice Cream Cake consists primarily of layers featuring crushed Oreos, ice cream (or sorbet), and often whipped cream as a topping or filling component. Typically made with two or more flavors of ice creams stacked between cookie layers provides varied texture while maintaining rich flavor profiles throughout each slice served.
How long does Oreo Ice Cream Cake last in the freezer?
When stored properly in an airtight container or tightly wrapped in plastic wrap after preparation time has elapsed (around four hours minimum), an Oreo Ice Cream Cake can last up to one month in the freezer without losing significant quality! However, consuming within two weeks yields optimal freshness when flavors remain vibrant!
Can I use other cookies instead of Oreos?
Absolutely! While Oreos are traditional favorites due their unique taste combination with creamy fillings inside them – feel free exploring other cookie options such as chocolate wafers or even graham crackers mixed into crusts if desired! Just ensure chosen alternative pairs harmoniously alongside layered fillings added during assembly phase!
Is it possible to make this dessert gluten-free?
Yes! To prepare gluten-free versions simply substitute regular Oreos with certified gluten-free alternatives available today while also confirming any additional ingredients selected (like sauces used) maintain necessary certifications too! There are several recipes online specifically tailored toward those needing dietary adjustments ensuring delicious outcomes remain achievable!
Can I make an Oreo Ice Cream Cake ahead of time?
Certainly! Preparing ahead offers convenience especially when hosting gatherings where desserts need pre-planning efforts done beforehand allowing stress-free enjoyment later on! You may assemble up until final decoration stages one day prior serving so everything stays fresh yet perfectly chilled upon cutting slices afterward!
What is the best way to serve an Oreo Ice Cream Cake?
The best way involves slicing cleanly using warmed knives dipped briefly under hot tap water prior cutting into frozen cakes which creates smooth edges without crumbling messes around plates afterward – serving alongside additional toppings such as chocolate drizzle enhances overall presentation while creating delightful experiences everyone loves indulging together!
Conclusion
In summary, making an exceptional Oreo Ice Cream Cake involves avoiding common mistakes such as not softening ice cream beforehand or skipping essential chilling times post-assembly which ensures flavors meld wonderfully while maintaining structure integrity throughout servings presented later on guests’ tables at celebrations alike! Incorporating various tips like trying different ice creams enhances flavor profiles considerably while utilizing homemade whipped creams elevates overall experiences enjoyed among family friends gathered together sharing memories formed over delicious desserts created lovingly in kitchens everywhere across generations past present future ahead!
By keeping these suggestions in mind along with FAQs answered above concerning preparation storage serving techniques – you’ll find yourself equipped fully ready tackle any challenges posed during creation processes ensuring enjoyable outcomes every single time served up delightfully enticing moments shared bonding times too cherished forevermore!
Print
Oreo Ice Cream Cake Recipe
- Prep Time: 20 minutes
- Cook Time: 30 minutes
- Total Time: 50 minutes
Description
A dreamy, no-bake dessert combining the crunch of Oreo cookies with creamy ice cream layers, topped with whipped topping and drizzled with chocolate syrup. Perfect for celebrations or a sweet indulgence!
Ingredients
- Oreo cookies: 24 (for crust and decoration)
- Butter: 4 tablespoons (melted)
- Ice cream: 1.5 quarts (6 cups, softened) – Vanilla, chocolate, or cookies & cream
- Whipped topping: 12 ounces (divided use)
- Chocolate syrup: 12 ounces (for drizzling)
- Optional toppings: Crushed Oreos, sprinkles, chopped nuts
Instructions
- Prepare the Crust:
Crush Oreo cookies into fine crumbs. Mix with melted butter until combined. Press the mixture firmly into the bottom of a 9-inch springform pan. Freeze for 10 minutes. - Add the First Layer of Ice Cream:
Spread 3 cups of softened ice cream evenly over the crust. Freeze for 30 minutes to firm up. - Add Whipped Topping and Oreos:
Spread 6 ounces of whipped topping over the frozen ice cream layer. Sprinkle crushed Oreos for texture. Freeze again for 15 minutes. - Add the Final Ice Cream Layer:
Spread the remaining 3 cups of softened ice cream on top. Drizzle with chocolate syrup and add decorative toppings like more Oreos or sprinkles. Cover with plastic wrap and freeze for at least 6 hours or overnight. - Serve and Enjoy:
Remove from the freezer, release from the springform pan, slice, and serve with extra chocolate syrup if desired!
Notes
- Soften the ice cream slightly for easy spreading but avoid letting it melt completely.
- For a fun twist, try flavored Oreos or different ice cream combinations!
- Store leftovers in an airtight container in the freezer for up to a week.


Leave a Comment