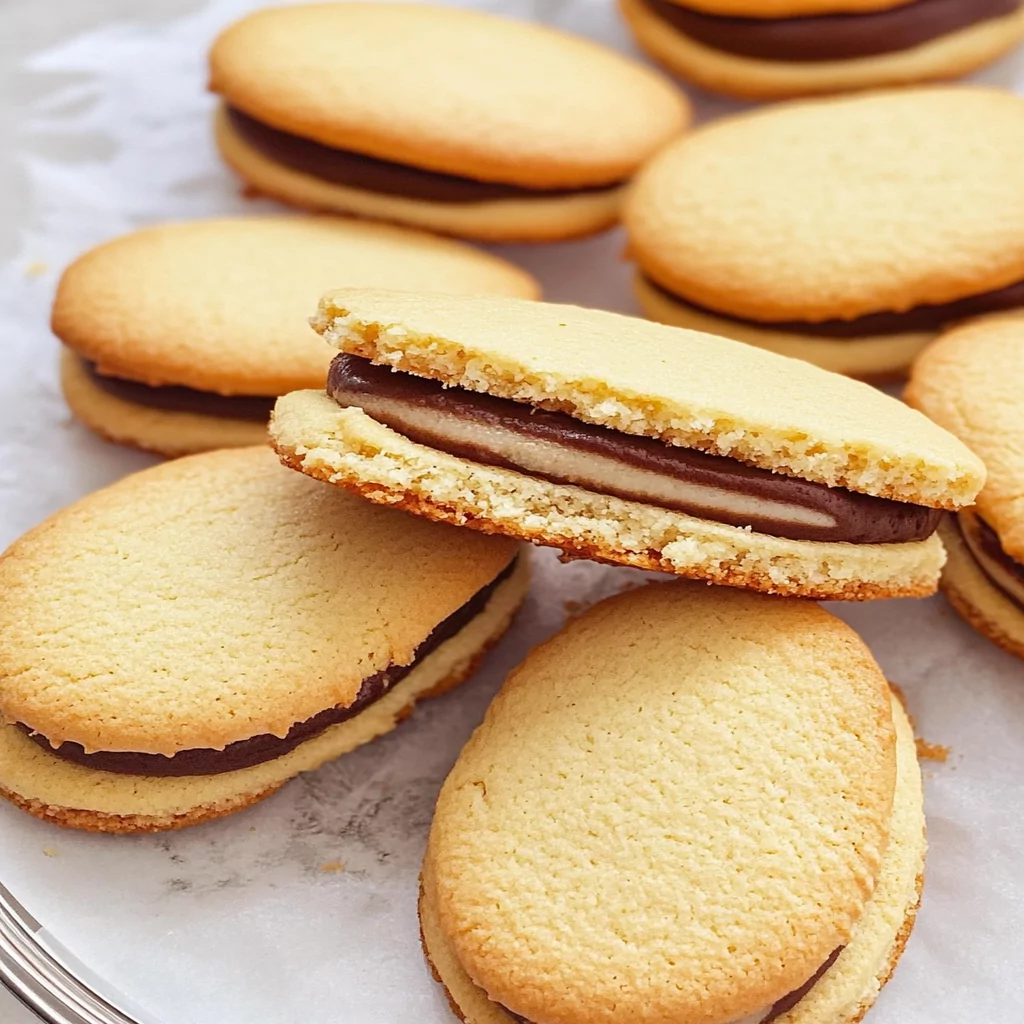
If you love the delicate balance of crispy cookies filled with rich chocolate, then this Milano Cookies Recipe is just what you need. These delightful treats are inspired by the classic Italian cookie that has won hearts around the world. Making your own version at home not only satisfies your sweet cravings but also allows you to customize flavors and ingredients to suit your taste. In this recipe, you will discover how to create the perfect Milano cookies that are crisp on the outside while being soft and chocolatey on the inside.
This step-by-step guide will walk you through each phase of making these delectable cookies from scratch. With simple ingredients that you likely already have in your pantry, this Milano cookies recipe is approachable for bakers of all levels. Imagine pulling freshly baked cookies out of your oven, their irresistible aroma filling your kitchen. You can enjoy them on their own or pair them with a cup of coffee or tea for an afternoon treat.
Let’s dive into the essential ingredients needed for crafting these delicious Milano cookies that will impress friends and family alike. Get ready to savor every bite!
Main Ingredients
Flour
Flour serves as the foundation for our Milano cookies. For this recipe, you will need 2 cups of all-purpose flour. This type provides the right structure and texture to create a crisp yet tender cookie. Make sure you measure accurately; too much flour can lead to dry cookies while too little may result in a dough that doesn’t hold its shape during baking.
Unsalted Butter
Butter adds richness and flavor to the cookies. Use 1 cup (2 sticks) of unsalted butter, softened at room temperature for ease of mixing. Unsalted butter allows you to control the saltiness of your cookie dough better than salted varieties. The butter should be creamy and easily spreadable but not melted, as this can affect how well your cookies hold together during baking.
Granulated Sugar
You’ll need 3/4 cup of granulated sugar to sweeten your Milanese delights. Sugar not only enhances sweetness but also helps in achieving a light texture in baked goods due to its ability to aerate when creamed with butter. Be sure to mix until thoroughly combined so that it contributes effectively to both flavor and texture.
Cocoa Powder
For that rich chocolate flavor in your filling, use 1/2 cup of unsweetened cocoa powder. This ingredient is crucial as it provides depth in taste without adding extra sweetness. Opt for high-quality cocoa powder for better flavor; it makes all the difference in elevating your homemade Milano cookies.
Eggs
Two large eggs are needed in this recipe to bind all ingredients together and add moisture to the dough. Eggs act as a leavening agent too; they help the cookies rise slightly during baking while creating a tender crumb structure.
Vanilla Extract
One teaspoon of pure vanilla extract enhances flavor significantly in baked goods like these cookies. It complements both the chocolate filling and buttery cookie base beautifully, adding warmth and depth without overwhelming other flavors.
Semi-Sweet Chocolate
For those delicious fillings between two cookie halves, you’ll require 1 cup of semi-sweet chocolate chips or chopped chocolate bars melted down into luscious goodness. This is what brings everything together—creating that iconic sandwich cookie experience everyone loves!

How to Prepare Milano Cookies Recipe
Step 1: Prepare Your Oven and Baking Sheets
Start by preheating your oven to 350°F (175°C). As it warms up, line two baking sheets with parchment paper; this prevents sticking and ensures even baking for each batch of your Milano cookies. Properly preheating is essential because it helps your dough maintain its shape upon entering the oven while providing that perfect golden-brown finish.
Step 2: Make the Cookie Dough
In a large mixing bowl, combine softened unsalted butter with granulated sugar using an electric mixer on medium speed until light and fluffy—about 3-5 minutes should suffice here! Next up is adding eggs one at a time followed by vanilla extract; mix until fully incorporated after each addition before moving forward.
Gradually sift in all-purpose flour along with cocoa powder while mixing slowly on low speed until just combined—be careful not to over-mix! Over-mixing can lead to tough cookies which we definitely want to avoid here! Scrape down any sides if necessary ensuring everything comes together nicely; this step really establishes that smooth consistency needed for shaping later on.
Step 3: Shape Your Cookies
Now it’s time for some fun—shaping those delightful cookie rounds! Using either a small ice cream scoop or tablespoon measure out equal portions from prepared dough onto lined baking sheets about an inch apart since they will spread slightly during baking time! Flatten each mound gently with fingers or spatula so they’re approximately half an inch thick—this encourages even cooking throughout without burning edges.
Once shaped properly cover them lightly with plastic wrap while we take care of melting our semi-sweet chocolate next!
Step 4: Melt Chocolate Filling
In a microwave-safe bowl or double boiler setup melt semi-sweet chocolate until smooth stirring frequently every thirty seconds if opting microwave method—this avoids scorching which ruins quality!
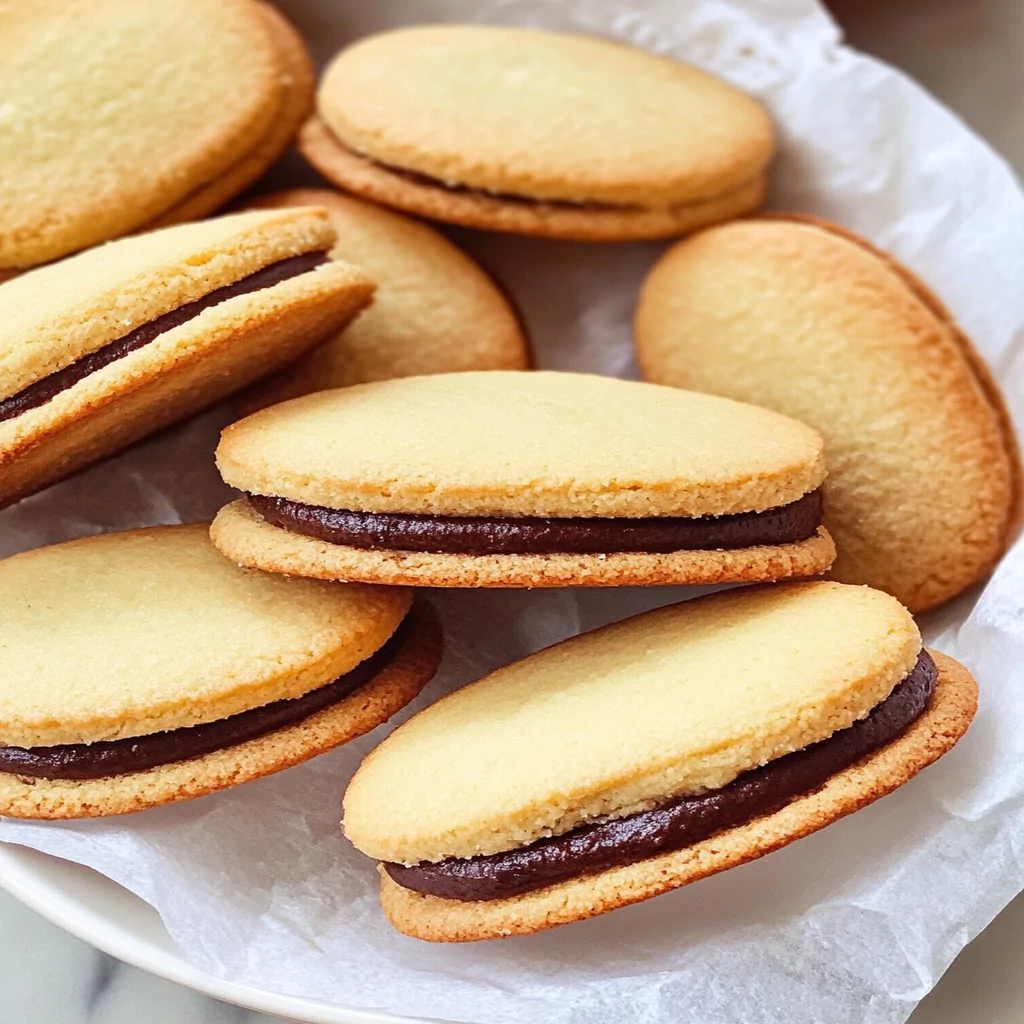
Once melted allow cooling slightly before using it immediately afterward; take one cooled cookie round place about half a teaspoon onto its bottom side then press another round gently atop creating sandwiches—a classic combination indeed! Repeat until all batches are completed then place back into refrigerator briefly allowing them firm up again before serving!
Serving and Storing Tips
Serving Suggestions
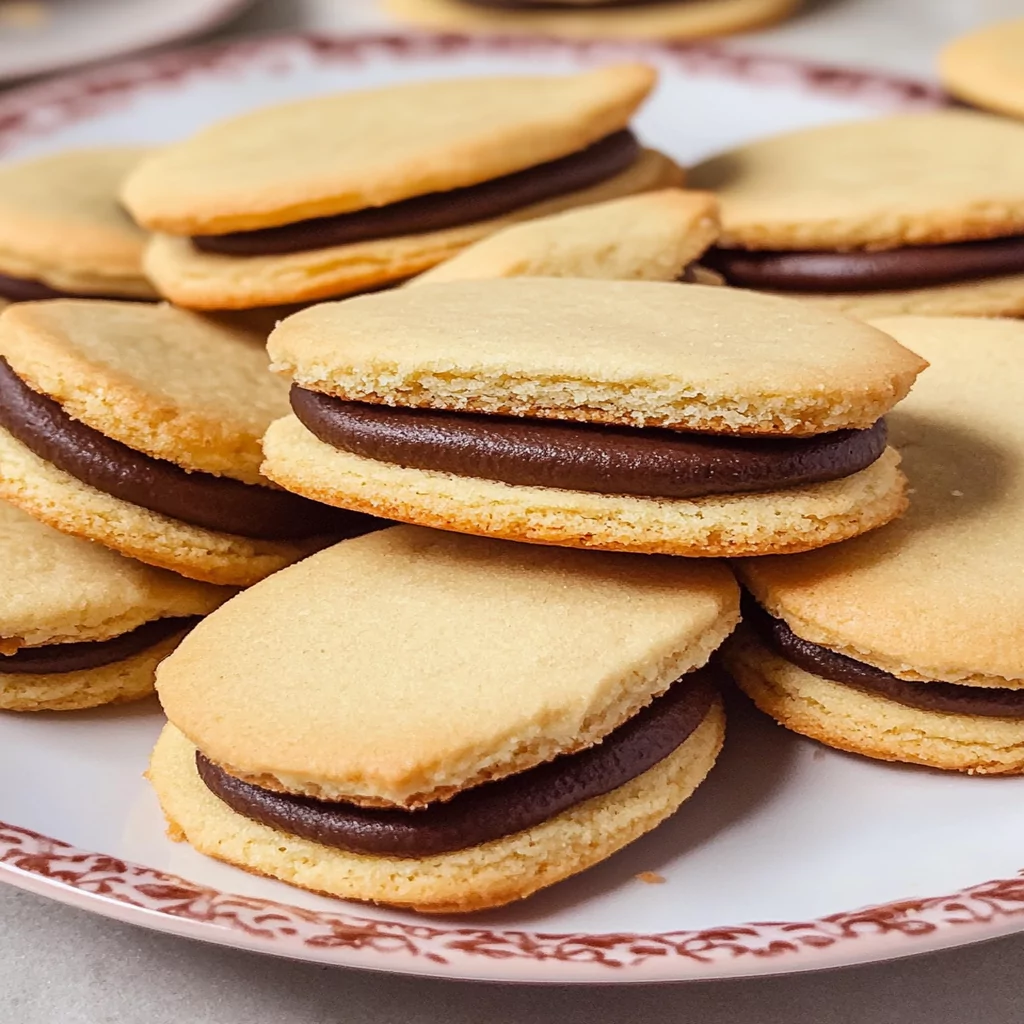
Milano cookies are versatile enough that they pair beautifully with various beverages or stand alone as delightful snacks! Serve them fresh out-of-the-oven still warm alongside coffee or espresso if you’re feeling fancy—perfectly balancing sweetness against bitterness found within those drinks! They also make excellent companions when hosting gatherings; display them elegantly on platters alongside fruits or nuts adding color contrast visually appealing guests won’t resist indulging upon arrival!
Consider creatively packaging some as gifts wrapped nicely showcasing love put forth during preparation; who doesn’t appreciate homemade goodies? Don’t forget about dessert tables at celebrations—they’re bound to be crowd favorites!
Storing Your Cookies
To store these delightful treats properly ensure they’re kept airtight either using resealable bags or containers lined with parchment paper between layers preventing sticking issues over time spent stored away from air exposure thereby maintaining freshness longer than usual outside environment would permit otherwise! Typically stored correctly they last up five days maximum without losing quality although freezing options remain viable extending lifespan further if desired by wrapping tightly before placing within freezer compartments where they’ll keep well several months ahead too!
When ready enjoy frozen simply thaw overnight fridge prior devouring whole again bringing joy back once more! Remember always check individual preferences regarding storage methods based personal experiences shared post-baking adventures—it enriches community dialogue around beloved recipes like our beloved milano creation today!
Mistakes to avoid
One common mistake when making Milano cookies is not chilling the dough. Many bakers overlook this step, believing it’s unnecessary. Chilling the dough allows the butter to solidify, which leads to a firmer texture and prevents spreading during baking. If you want your Milano cookies to maintain their shape and have that perfect crispiness, ensure you refrigerate the dough for at least an hour before baking.
Another frequent error is using the wrong type of chocolate filling. While it may be tempting to use any chocolate you have on hand, opting for high-quality chocolate will elevate your cookie experience. Look for chocolate that has a rich flavor and smooth texture. This choice significantly impacts the overall taste of the Milano cookies, so don’t skimp on this crucial ingredient.
Overbaking is also a common pitfall in cookie-making. Each oven varies in temperature, so keep a close eye on your cookies as they bake. Milano cookies should be lightly golden around the edges but soft in the center when you remove them from the oven. Allowing them to cool on the baking sheet will help them achieve that ideal texture without becoming too hard.
In addition, failing to measure ingredients accurately can lead to unwanted results. Baking is a science, and precise measurements are crucial for achieving the right balance of flavors and textures. Use a kitchen scale or measuring cups to ensure consistency in your Milano cookies recipe.
Lastly, don’t underestimate the power of letting your cookies rest after baking. Letting them sit for about 10 minutes before transferring them to a wire rack allows them to firm up while retaining moisture. Rushing this step can result in fragile cookies that break easily.
Tips and tricks
When making Milano cookies, one essential tip is to use room-temperature ingredients. This includes butter and eggs, which blend more easily into your dough. Softened butter helps create a smoother batter and allows for better incorporation of other ingredients. Always set out these items ahead of time so they reach room temperature by mixing time.
Another effective trick is to use parchment paper on your baking sheets. This not only prevents sticking but also ensures even cooking across all cookies. Parchment paper can absorb excess moisture from the cookie bottoms, resulting in perfectly baked Milano cookies with a nice crisp exterior.
Experimenting with flavors can enhance your Milano cookies recipe significantly. Instead of just vanilla extract, consider adding almond extract or citrus zest for an unexpected twist that complements the chocolate filling beautifully. Such variations can make your homemade cookies stand out at gatherings and impress friends and family alike.
For those who love texture, try incorporating finely chopped nuts into your dough. Almonds or hazelnuts can add crunch and extra flavor without overwhelming the classic Milano profile. Just be cautious not to overdo it—balance is key in maintaining that signature cookie experience.
Using a piping bag for assembling your cookies can make things easier and neater. It allows for precision when spreading or piping chocolate filling between two cookie halves, ensuring an even layer every time. A well-done filling enhances both aesthetics and taste.
Finally, store your finished Milano cookies correctly to maintain freshness. Use an airtight container at room temperature for up to one week or freeze them for longer storage options. Proper storage preserves their delightful flavor and crunchy texture until you’re ready to enjoy them again.
Suggestions for Milano Cookies Recipe
To elevate your Milano cookies recipe further, consider using dark chocolate instead of regular milk chocolate for filling. Dark chocolate brings a richer flavor profile that balances well with the sweetness of the cookie itself. This small change can transform an already delicious treat into something extraordinary that appeals to more mature palates.
Another suggestion is incorporating different fillings besides chocolate ganache or cream filling between the cookie layers. You could try flavored jams or fruit preserves like raspberry or apricot; these will add tartness and complexity that pairs wonderfully with sweet cookie layers while providing an interesting twist on traditional recipes.
For added visual appeal, consider dusting powdered sugar over cooled cookies before serving or packaging them as gifts. This simple touch elevates presentation without changing flavors drastically and gives an elegant finish that makes these treats feel special.
If you want a fun addition during holidays or special occasions, try shaping your Milano cookies differently! Use festive cookie cutters or create seasonal designs with icing after baking; this makes these delightful treats even more engaging when shared among friends or family gatherings.
Lastly, think about pairing these delectable Milano cookies with beverages like coffee or tea during afternoon breaks or dessert serving times! The rich flavors complement each other beautifully—creating memorable experiences around food contributes greatly toward enjoying life’s sweet moments together!
FAQs
What are Milano Cookies?
Milano cookies are delicate sandwich-style biscuits made from two thin chocolate-flavored wafers filled with creamy chocolate ganache or similar fillings in between them. These iconic treats originated from Pepperidge Farm but have become beloved by many home bakers seeking their unique combination of crispy texture outside paired with smooth richness inside!
How can I store my homemade Milano Cookies?
To maintain freshness after preparing homemade Milano cookies, store them in an airtight container at room temperature away from direct sunlight for up to one week! If you’d like longer shelf life options available—freezing will preserve quality effectively while allowing enjoyment later when cravings strike!
Can I make gluten-free versions of Milan Cookies?
Absolutely! Substitute all-purpose flour with gluten-free flour blends designed specifically for baking purposes while following other instructions unchanged within this milano cookie recipe! Ensure no cross-contamination occurs by thoroughly cleaning surfaces used during preparation if necessary—this ensures everyone enjoys treats without worry!
What fillings other than chocolate work well with Milano Cookies?
While traditional fillings include various types of chocolates like ganaches or creams—jams (such as raspberry), peanut butter spreads mixed with powdered sugar & cream cheese frosting offer tasty alternatives worth exploring! Feel free experimenting until finding combinations suit personal taste preferences best!
Why did my Milano Cookies spread too much while baking?
Excessive spreading could mean several factors contributed: either too warm dough before placing it into ovens (make sure chilling occurs properly) OR incorrect measurements leading towards imbalances among ingredients (especially butter ratios). Reassessing preparation methods may solve concerns like these!
How long do I need to chill my dough before baking?
Aim for refrigerating milano cookie dough at least one hour prior getting baked! This step helps solidify fats improving final results preventing unwanted spreading during cooking sessions ensuring beautiful shapes maintained throughout process while enhancing flavors through proper resting times!
Conclusion
In conclusion, mastering a delicious Milano cookies recipe involves avoiding common mistakes such as neglecting proper chilling techniques and choosing low-quality chocolates. By keeping diligent attention during preparation steps—from ingredient quality selection down through accurate measurements—you’ll achieve irresistible results every time! Don’t forget about innovative tips & tricks like utilizing parchment paper along with creative fillings providing fresh twists enhancing enjoyment levels immensely!
Remember also how essential resting periods play roles post-baking—allowing optimal transition towards enjoying delightful creations made yourself—whether sharing moments together amongst friends/family members savoring these bites together becomes cherished memories built around food experiences shared deeply enriches lives beyond just mere sustenance alone!
Print
Milano Cookies Recipe for Delicious Treats
- Prep Time: 25
- Cook Time: 10
- Total Time: 35 minutes
Description
Delight in these homemade Milano cookies with a buttery base and rich chocolate filling. Perfect for sharing or indulging, these treats are crisp, tender, and simply irresistible.
Ingredients
- Flour: 2 cups, all-purpose
- Unsalted Butter: 1 cup, softened
- Granulated Sugar: ¾ cup
- Eggs: 2 large
- Vanilla Extract: 1 tsp
- Cocoa Powder: ½ cup, unsweetened
- Semi-Sweet Chocolate: 1 cup, melted
Instructions
- Preheat & Prep: Preheat oven to 350°F (175°C) and line baking sheets with parchment paper.
- Make Dough: Cream butter and sugar until fluffy. Add eggs, vanilla, then sift in flour and cocoa; mix until smooth.
- Shape & Bake: Scoop and flatten dough rounds on baking sheets. Bake for 10 minutes until lightly golden.
- Fill & Assemble: Melt chocolate, cool slightly, then spread on one cookie and sandwich with another. Chill briefly before serving.
Notes
- Measure flour accurately to avoid dry cookies.
- For an even richer filling, use high-quality chocolate.
- Chill assembled cookies for a firmer texture before serving.
Leave a Comment