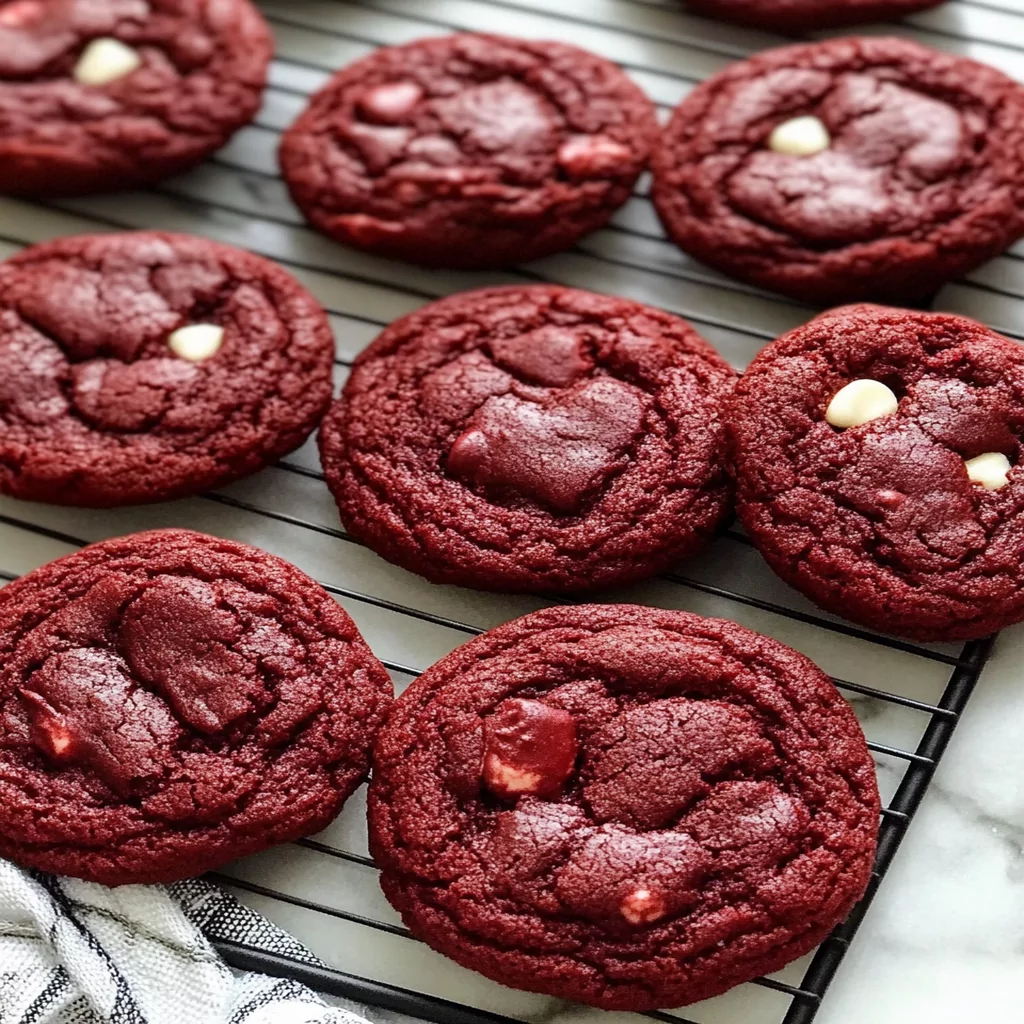
Red velvet cookies are a delightful twist on the classic red velvet cake that many adore. These vibrant treats combine the signature crimson color and buttery taste of red velvet with a soft, chewy texture that will leave your taste buds dancing. Whether you’re planning a special occasion or simply want to indulge in something sweet, this red velvet cookie recipe is sure to impress.
What makes these cookies truly special is the addition of cream cheese frosting. It brings a tangy sweetness that complements the rich flavor of the cookie perfectly. In just a few simple steps, you can whip up a batch of these delicious cookies that will be the highlight of any dessert table.
In this article, we’ll explore all the essential ingredients needed to create these mouthwatering red velvet cookies. You’ll also find detailed instructions on how to prepare them step by step. Finally, we’ll share some serving and storage tips to ensure that your cookies remain fresh and delicious for as long as possible. So let’s dive into this scrumptious world of red velvet delights!
Main Ingredients
All-Purpose Flour
All-purpose flour serves as the foundation for our red velvet cookies. For this recipe, you will need 2 cups of all-purpose flour. This versatile ingredient provides structure and stability to the cookies while allowing them to rise perfectly during baking.
Cocoa Powder
Cocoa powder adds depth of flavor and richness to these delightful treats. You will require 1/4 cup of unsweetened cocoa powder for this recipe. It enhances the chocolate undertones in the cookie while maintaining that signature red hue.
Baking Soda
Baking soda is essential for achieving the proper rise in your red velvet cookies. You will need 1 teaspoon of baking soda. This leavening agent reacts with acidity from other ingredients, helping your cookies become light and fluffy.
Sugar
Sugar sweetens our red velvet delights beautifully. Use 1 cup of granulated sugar for this recipe. It not only sweetens but also contributes to the overall texture of the cookie by creating a tender crumb.
Butter
Butter is crucial for providing richness and flavor to our cookies. You will need 1/2 cup (or one stick) of unsalted butter at room temperature. Softened butter creates a smooth batter and ensures that your cookies have that melt-in-your-mouth quality.
Egg
One large egg binds all ingredients together and adds moisture to the dough. Make sure it’s at room temperature for better incorporation into the batter.
Buttermilk
Buttermilk introduces moisture and tanginess into our cookies. Use 1/2 cup of buttermilk for this recipe; it helps activate the baking soda and creates a tender texture in every bite.
Vanilla Extract
A teaspoon of pure vanilla extract goes a long way in enhancing flavors in baked goods. It adds warmth and depth to your red velvet cookies without overpowering them.
Food Coloring
To achieve that stunning vibrant color characteristic of red velvet treats, you’ll need 2 tablespoons of liquid red food coloring. This ingredient not only provides color but also enhances visual appeal when serving or gifting these delightful cookies.
Cream Cheese Frosting (Optional)
While optional, cream cheese frosting elevates these cookies to new heights! For an indulgent topping, use 8 ounces of softened cream cheese mixed with 1/4 cup unsalted butter and 2 cups powdered sugar until creamy.

How to Prepare Red Velvet Cookies
Step 1: Preheat Your Oven
Begin by preheating your oven to 350°F (175°C). Preheating ensures even cooking throughout your baking process – an important step not to overlook! While waiting for your oven to heat up, line two baking sheets with parchment paper or silicone mats. This prevents sticking and makes cleanup easier after baking these delectable treats.
Step 2: Mix Dry Ingredients
In a medium bowl, whisk together your all-purpose flour, cocoa powder, baking soda, and salt until well combined. This step ensures there are no clumps in your dry mix which could affect texture later on during baking! Set aside once done mixing – we will incorporate it back shortly!
Step 3: Cream Butter & Sugar
In another large mixing bowl using an electric mixer or stand mixer fitted with a paddle attachment; beat together softened butter and granulated sugar at medium speed until light and fluffy—approximately three minutes should suffice! The mixture should appear pale yellow when finished mixing correctly; this indicates proper aeration has occurred which results in tender cookies once baked!
Step 4: Add Egg & Vanilla
Next up; add in one large room-temperature egg along with one teaspoon vanilla extract into butter-sugar mixture! Beat again until fully incorporated—this adds moisture alongside flavor into our mixture making each bite irresistible!
Step 5: Combine Wet & Dry Ingredients
Now it’s time to blend everything together! Gradually incorporate those previously mixed dry ingredients into wet ones while alternating with half a cup buttermilk; start by adding one-third dry mix followed by half buttermilk—repeat until everything is smoothly combined ensuring no lumps remain behind! Don’t overmix though – stop once just combined!
Step 6: Add Food Coloring
To achieve that iconic vibrant hue characteristic within any classic “red velvet” treat; pour two tablespoons liquid food coloring directly into batter while mixing gently until evenly distributed throughout—don’t worry if it looks too dark at first; they will lighten slightly upon baking!
Step 7: Scoop Dough onto Baking Sheets
Using either spoon or small ice cream scoop portion out dough onto prepared sheets leaving approximately two inches apart between each mound—this allows room for spreading during baking process so they don’t merge together forming one giant cookie!
Step 8: Bake Cookies
With everything ready now place both trays inside preheated oven—bake those beauties for about ten minutes maximum or until edges begin turning golden brown—you want soft centers so avoid overbaking! Once done remove trays from oven allowing cooling just briefly before transferring onto wire racks—this helps maintain texture better than letting them sit directly on hot surfaces afterwards!
Serving and Storing Tips
Serving Suggestions
These delectable red velvet cookies shine when paired with various accompaniments! For instance consider serving them warm right out of oven topped generously with freshly whipped cream or slathered with luscious cream cheese frosting for an indulgent experience everyone would love! Alternatively serve alongside vanilla ice cream scoops drizzled lightly atop plates—they make excellent desserts during gatherings such as birthday parties anniversaries holidays gatherings etc., impressing guests effortlessly every single time!
Storing Properly
To keep those scrumptious delights fresh longer store cooled baked goods inside airtight containers kept at room temperature away from direct sunlight exposure—this preserves moisture preventing them from drying out too quickly! If desired they may also be frozen individually wrapped tightly ensuring their stay delicious even weeks later—just thaw beforehand enjoying whenever cravings strike next time around!
Following these guidelines will help ensure success whether hosting events entertaining family friends celebrating life’s moments big small alike enjoy delectable bites consistently throughout year ahead ahead—we wish happy baking everyone excitedly diving into world tasty creations starting today onwards making memories along way together forevermore!
—
Mistakes to avoid
One of the most critical mistakes when making red velvet cookies is not measuring ingredients accurately. Baking is a science, and precision is key to achieving the desired texture and flavor. Using too much flour or too little sugar can lead to dry, crumbly cookies rather than the soft, chewy treats you desire. Always use a kitchen scale for accuracy or follow measuring techniques diligently, such as spooning flour into a measuring cup and leveling it off with a knife.
Another common pitfall is overlooking the importance of room temperature ingredients. Butter and eggs should be at room temperature for optimal mixing. Cold butter doesn’t cream well with sugar, leading to a denser cookie that lacks the lightness you want. Similarly, cold eggs can inhibit proper emulsification in your dough, affecting overall texture. Allow these ingredients to sit out for about 30 minutes before you start baking.
Baking time can also make or break your red velvet cookies. Overbaking leads to hard, crunchy cookies instead of soft ones, while underbaking can create a gooey mess that doesn’t hold its shape. Keep an eye on your cookies during the last few minutes of baking. They should appear slightly underbaked when you take them out; they will continue cooking on the baking sheet after removal.
Finally, using poor-quality cocoa powder can significantly affect the flavor of your red velvet cookies. Opt for high-quality Dutch-processed cocoa powder for a rich taste and vibrant color. Avoid generic brands that may compromise the overall flavor profile of your cookies.
Tips and tricks
To enhance your red velvet cookies, consider chilling your dough before baking. Chilling helps prevent spreading during baking, which results in thicker cookies that maintain their shape better. Aim to chill the dough for at least 30 minutes but longer if possible—up to 24 hours in the refrigerator can yield even better results.
Incorporating buttermilk into your recipe offers a tangy richness that elevates the flavor of your red velvet cookies. Buttermilk adds moisture without making the dough overly wet and contributes to that classic velvet texture. If you don’t have buttermilk on hand, you can create a substitute using milk and vinegar or lemon juice—simply mix one tablespoon of vinegar or lemon juice with one cup of milk and let it sit for about five minutes.
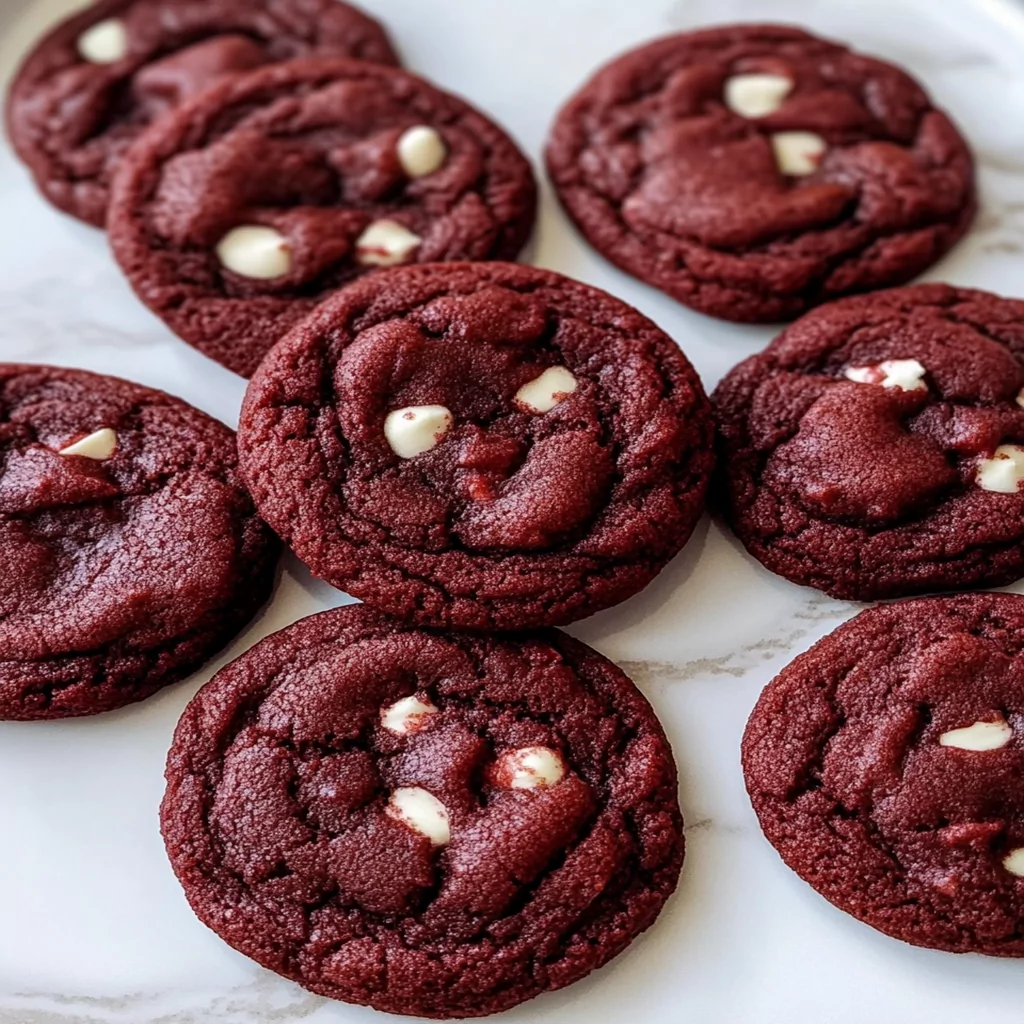
Consider adding chocolate chips or white chocolate chunks into your cookie dough for an extra layer of flavor and texture. These additions pair beautifully with red velvet’s unique taste and provide delightful surprises in each bite.
Don’t forget about presentation! Drizzling cream cheese frosting over cooled cookies not only enhances their appearance but also adds an indulgent sweetness that complements the cocoa flavor perfectly. For an elegant touch, sprinkle some crushed nuts or additional cocoa powder on top before serving.
Suggestions for Red Velvet Cookies
To ensure your red velvet cookies turn out perfectly every time, invest in quality baking equipment. A good set of measuring cups and spoons will help you achieve accuracy in ingredient amounts. Additionally, silicone baking mats or parchment paper can prevent sticking and promote even baking.
Using gel food coloring instead of liquid food coloring is another suggestion worth noting. Gel food coloring provides a more vibrant hue without altering the consistency of your cookie dough too much. This method will yield those beautifully rich red velvet hues we all adore without compromising texture.
It’s also essential to store leftover cookies properly to maintain freshness. Place them in an airtight container at room temperature for up to five days or freeze them for longer storage—perfect for having delicious treats available anytime! When freezing, separate layers with parchment paper so they don’t stick together when thawed.
Lastly, consider experimenting with different add-ins like nuts or dried fruits to customize your red velvet cookies further. Walnuts provide a delightful crunch while raisins offer natural sweetness—both make excellent options depending on personal preference.

FAQs
What makes red velvet cookies different from regular chocolate cookies?
Red velvet cookies stand out due to their unique combination of flavors: they incorporate cocoa powder along with buttermilk for added tanginess and richness. The signature vibrant red color comes from food coloring that’s often used alongside these ingredients, creating not just a distinct taste but also an eye-catching appearance compared to standard chocolate cookies.
Can I use cake flour instead of all-purpose flour in my red velvet cookie recipe?
Yes, using cake flour instead of all-purpose flour can result in softer, more tender red velvet cookies due to its lower protein content. Cake flour absorbs less liquid than all-purpose flour; thus, adjustments may be necessary regarding other wet ingredients if substituting one-for-one in recipes.
How do I prevent my red velvet cookies from spreading too much while baking?
To prevent excessive spreading during baking, ensure that your butter is softened rather than melted before mixing it with sugar and eggs; melted butter leads to runny dough which spreads easily in the oven! Chilling your cookie dough before baking also helps keep them thicker as they cook.
What type of frosting works best with red velvet cookies?
Cream cheese frosting pairs exceptionally well with red velvet due to its tangy sweetness complementing this dessert’s rich flavors perfectly! You might also enjoy buttercream frosting if you prefer something sweeter; both options enhance these delicious treats brilliantly!
Are there gluten-free options available for making red velvet cookies?
Absolutely! You can substitute traditional all-purpose flour with gluten-free alternatives like almond flour or oat flour while ensuring other ingredients are gluten-free certified as well! Just note that texture may vary slightly between flours—experimenting until you find what works best is key!
How should I store leftover red velvet cookies?
Store leftover red velvet cookies by placing them in an airtight container at room temperature for up to five days; this keeps them fresh! For extended storage duration beyond this timeframe (like weeks), consider freezing them individually wrapped in plastic wrap within resealable bags—the perfect solution whenever cravings strike!
Conclusion
Baking perfect red velvet cookies requires attention to detail and awareness of common pitfalls along the way! Key aspects include accurate ingredient measurement, using room-temperature items like butter and eggs, precise baking times tailored according to individual ovens’ characteristics; these factors play crucial roles in achieving desired textures! Embrace helpful tips such as chilling dough prior-to-baking along with utilizing quality ingredients—including high-grade cocoa powder—to elevate flavors dramatically! Additionally exploring various add-ins fosters creativity while customizing this beloved treat further satisfies diverse tastes among friends & family alike!
By following outlined suggestions consistently paired alongside thorough understanding & knowledge surrounding what mistakes need avoiding during preparation ensures success each time these sweet delights grace our tables! Enjoy indulging guilt-free knowing how simple yet rewarding this process truly becomes once mastered through practice & patience over time!
Print
Irresistible Red Velvet Cookies Recipe
- Prep Time: 15 minutes
- Cook Time: 10 minutes
- Total Time: 25 minutes
Description
Indulge in these soft and flavorful red velvet cookies, enhanced with a vibrant red hue and a rich cocoa undertone. Perfectly sweet, with optional cream cheese frosting for extra decadence, these cookies are ideal for any occasion!
Ingredients
- All-Purpose Flour: 2 cups
- Cocoa Powder: 1/4 cup
- Baking Soda: 1 tsp
- Sugar: 1 cup
- Butter: 1/2 cup (softened)
- Egg: 1 large
- Buttermilk: 1/2 cup
- Vanilla Extract: 1 tsp
- Red Food Coloring: 2 tbsp
- Cream Cheese Frosting (optional): Cream cheese, butter, powdered sugar
Instructions
- Preheat Oven: Set to 350°F (175°C). Line baking sheets with parchment paper.
- Mix Dry Ingredients: Combine flour, cocoa powder, and baking soda in a bowl.
- Cream Butter & Sugar: Beat softened butter and sugar until light and fluffy.
- Add Egg & Vanilla: Mix in the egg and vanilla extract.
- Combine Wet & Dry: Alternate adding the dry mix and buttermilk, blending until smooth.
- Add Food Coloring: Mix in red food coloring until evenly distributed.
- Scoop Dough: Place dough onto baking sheets, leaving space between cookies.
- Bake: Bake for 10 minutes or until edges are set. Cool on a wire rack.
Notes
- For an indulgent touch, frost cooled cookies with cream cheese frosting.
- Ensure all ingredients are at room temperature for better blending.
- Use parchment paper to prevent sticking and make cleanup easier.


Leave a Comment