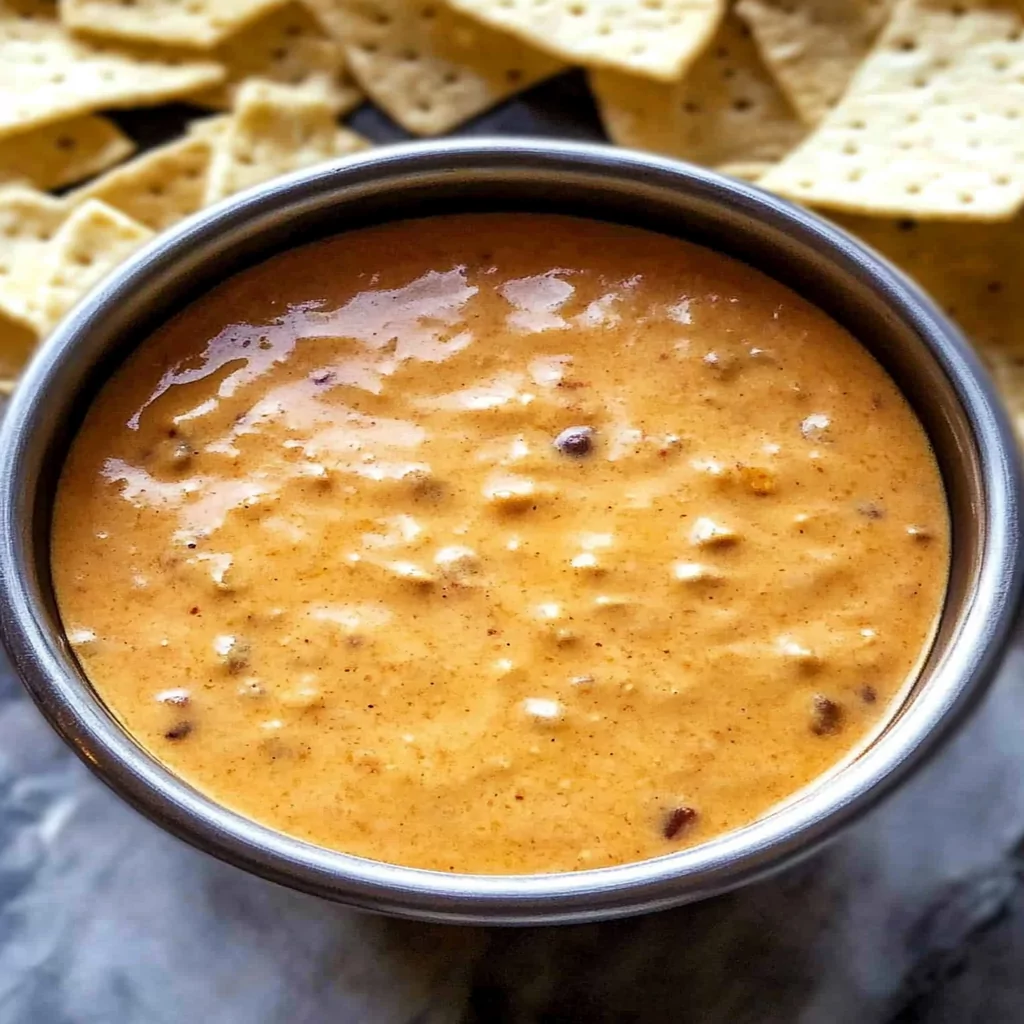
Chili Cheese Dip is the ultimate crowd-pleaser that combines creamy cheese with zesty chili flavors. This recipe is perfect for gatherings, game days, or even a cozy night in. Imagine dipping crispy tortilla chips into a warm bowl of melted cheese mixed with savory chili – it’s pure comfort food! Not only is it delicious, but it’s also incredibly easy to make. In just a few simple steps, you can whip up a batch that will impress your friends and family.
The beauty of this Chili Cheese Dip lies in its versatility. You can customize it by adding your favorite toppings such as jalapeños, diced tomatoes, or green onions. Whether you prefer a mild dip or something with a kick, this recipe can be adapted to suit your taste. Plus, it’s a fantastic way to make use of leftover chili if you have some on hand.
In this article, you’ll find everything from the main ingredients you’ll need to detailed preparation instructions that ensure your dip comes out perfectly every time. We’ll also share some serving suggestions and storage tips so that you can enjoy your Chili Cheese Dip long after it’s been made. So grab your ingredients and let’s get started on this cheesy delight!
Main Ingredients
Cream Cheese
Cream cheese is the base for our Chili Cheese Dip. It lends a rich creaminess that balances the spices perfectly. For this recipe, you’ll need 8 ounces of softened cream cheese. Softening it beforehand makes blending easier and results in a silky texture.
Cheddar Cheese
Cheddar cheese adds depth of flavor and that gooey texture we all love in dips. Use about 2 cups of shredded sharp cheddar cheese for maximum flavor impact. Sharp cheddar brings a punch while still melting beautifully, giving the dip an irresistible creaminess.
Canned Chili
Canned chili serves as the star ingredient in this recipe. Select your favorite brand or type; I recommend using 1 can (15 ounces) of beef or turkey chili without beans for the best consistency. The chili contributes savory notes and spices that elevate the overall flavor profile.
Sour Cream
Sour cream enhances the dip’s creaminess while adding a tangy contrast to the rich cheeses. You’ll need approximately ½ cup of sour cream for our recipe. This ingredient helps balance out the heat from any spices in the chili while making the dip more luscious.
Jalapeños
For those who like their dips spicy, jalapeños are an excellent addition! Use about 1/4 cup of diced fresh jalapeños (or pickled ones if preferred). These peppers add not only heat but also brightness to your dish.

How to Prepare Chili Cheese Dip
Step One: Preheat Your Oven
Begin by preheating your oven to 350°F (175°C). This step ensures that your Chili Cheese Dip will cook evenly once assembled. While waiting for the oven to reach temperature, gather all your ingredients together on a clean countertop or workspace so they are easily accessible during preparation.
Step Two: Mix Your Ingredients
In a large mixing bowl, combine your softened cream cheese with sour cream until smooth using an electric mixer or spatula. Make sure there are no lumps remaining; this creates a seamless texture in your final dip. Next, add in half of your shredded cheddar cheese along with canned chili and diced jalapeños (if using). Stir everything together until well blended; you should see beautiful swirls of yellow from the cheddar throughout!
Step Three: Transfer to Baking Dish
Once mixed thoroughly, transfer your dip mixture into an oven-safe baking dish (about 9×9 inches works well). Smooth out the top with a spatula for even cooking. Now sprinkle remaining shredded cheddar over the top generously; this will create a melty crust once baked.
Step Four: Bake Your Dip
Place your prepared dish into the preheated oven carefully and bake for approximately 20 minutes or until bubbly around edges and golden brown on top. Keep an eye on it towards the end—every oven varies slightly! Once done baking, remove it from the oven carefully using oven mitts as it will be very hot.
Step Five: Let It Cool Before Serving
Allow your deliciously cheesy concoction to cool slightly before serving—this helps set up its texture and makes dipping easier! Meanwhile prepare any accompaniments such as tortilla chips or veggie sticks nearby for guests who can’t wait too long!

Serving and Storing Tips
How to Serve Your Chili Cheese Dip
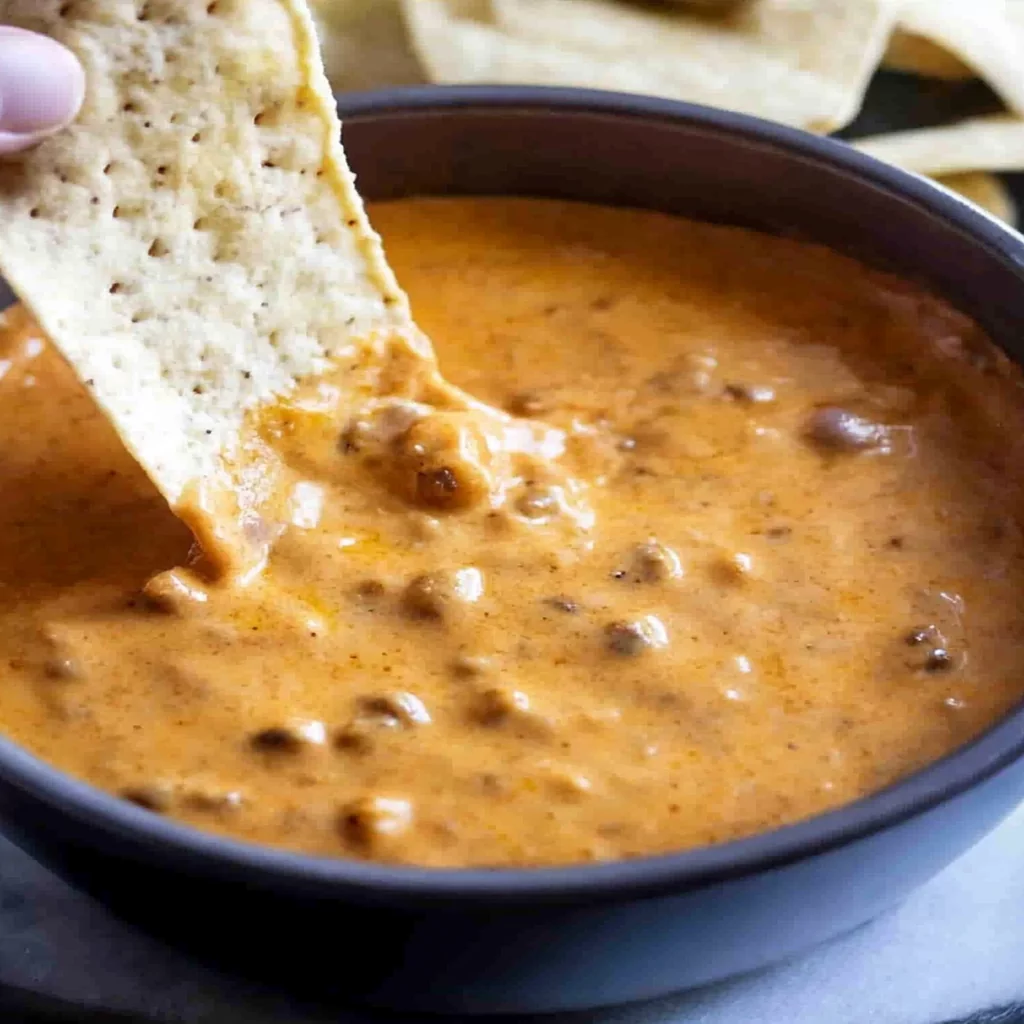
Serving is simple! Present it hot straight from the oven alongside crispy tortilla chips or pita bread slices arranged neatly around it on a platter for guests’ convenience—this makes dipping effortless! For added flair consider garnishing with freshly chopped cilantro leaves or extra jalapeño slices right before serving; these little touches enhance both appearance & flavor profiles beautifully creating an inviting atmosphere at any gathering.
Storing Leftover Dip
If you happen to have leftover Chili Cheese Dip (though it’s unlikely), let it cool completely before storing in an airtight container in refrigerator where it will keep fresh for up to three days maximum! To reheat simply place back into an oven-safe dish covered loosely with aluminum foil at 350°F until warmed through again—about 15-20 minutes depending on quantity left over!
Freezing Options
For longer storage periods freezing is another option available too! Portion cooled leftovers into freezer-safe containers labeled clearly along date made then store flat within freezer bags allowing more space-saving later on when stacked within freezers themselves ensuring nothing gets lost among other items stored away; these can last up six months frozen properly maintained!
Pairing Suggestions
Consider pairing your flavorful dip with various sides such as crunchy veggies like carrots & celery sticks alongside classic tortilla chips; both options complement its creamy character nicely while providing some healthy alternatives too! Additionally serve alongside cocktails like margaritas which enhance flavors yet keep gatherings lively throughout evenings full laughter shared amongst friends family alike enjoying good food together!
Now you’re ready to indulge in one of our most beloved recipes—Chili Cheese Dip—perfectly crafted just for you & yours today!
Mistakes to avoid
One common mistake when making chili cheese dip is using pre-shredded cheese. Many people opt for this convenience, but it often contains anti-caking agents that can affect the melt and texture of your dip. Instead, choose block cheese and shred it yourself. This small adjustment can significantly enhance the creaminess and flavor of your chili cheese dip. Shredding your own cheese ensures a smoother consistency, allowing the flavors to blend beautifully.
Another frequent error is overcooking the ingredients. When you heat your dip too long, you risk separating the cheese and creating an unappetizing texture. Instead, focus on melting the cheese just until it’s gooey and well combined with other ingredients. Keeping a close eye on your mixture while stirring will help prevent this issue. Remember that residual heat will continue to cook the dip even after removing it from the stove.
A third mistake involves ingredient selection. Some people may think that all canned chili is created equal; however, this isn’t true. Choosing high-quality chili will elevate your dish significantly. Look for options with robust flavors and minimal fillers or preservatives. Quality ingredients lead to better taste in any recipe, including chili cheese dip.
Lastly, neglecting seasoning can ruin an otherwise delicious dip. While chili usually packs some flavor, additional spices like cumin, garlic powder, or cayenne pepper can elevate the taste profile. Don’t be afraid to experiment with spices to find the perfect balance for your palate. Just remember to taste as you go; adjusting flavors during cooking can make a big difference.
Tips and tricks
To create the best chili cheese dip possible, start by preparing your base properly. Sauté onions and garlic before adding them to your dip mixture. This simple step adds depth of flavor that enhances every bite. Cooking these aromatics until they are translucent will release their natural sweetness and create a more complex taste in your finished dish.
Utilizing different types of cheeses can also elevate your chili cheese dip game. While cheddar is a classic choice, consider combining it with pepper jack for some heat or cream cheese for extra creaminess. Mixing various cheeses allows you to customize textures and flavors according to preferences, giving everyone something to enjoy.
Another valuable tip is serving your chili cheese dip warm but not scorching hot. This ensures that everyone at the party can enjoy it right away without burning their mouths! Keep your dip warm by placing it in a slow cooker on low heat or using a warming tray if you’re serving at an event.
Presentation plays a crucial role in how appealing food looks on a table. Serve your chili cheese dip in an attractive dish and garnish it with chopped green onions or fresh cilantro for color and freshness. Pairing it with an assortment of dippers such as tortilla chips, veggies, or bread adds variety and encourages guests to mingle around the snack table.
Finally, don’t forget about leftovers! If you end up with extra chili cheese dip after an event, store it properly in an airtight container in the fridge for up to three days. Reheat gently on low heat when you’re ready to enjoy it again, adding a splash of milk if necessary for smoothness.
Suggestions for Chili Cheese Dip
For those looking to make their chili cheese dip even more delightful, consider incorporating fresh ingredients like diced tomatoes or jalapeños into the mix before baking. These additions contribute vibrant colors while enhancing flavor profiles that tantalize taste buds.
If you’re aiming for healthier options without sacrificing taste, opt for Greek yogurt instead of sour cream as a topping or base ingredient when making dips like this one. Greek yogurt provides creaminess while cutting down calories significantly, making it a smart alternative without skimping on flavor.
Experimenting with different beans can also add unique textures to your chili cheese dip. Black beans or pinto beans complement traditional flavors beautifully while providing added nutrition and fiber benefits—just be sure not to overdo it so that they don’t overpower everything else!
Moreover, consider customizing spice levels based on personal preferences or guest needs—this way everyone enjoys their experience! Providing additional toppings such as crushed red pepper flakes allows guests control over their spice level without compromising enjoyment levels across varying palates.
Lastly, serve alongside a refreshing beverage option like iced tea or lemonade since these drinks pair beautifully with cheesy dishes filled with bold flavors! This simple addition ensures guests have plenty of choices when enjoying their tasty creations together!
FAQs
What is Chili Cheese Dip made from?
Chili cheese dip typically consists of melted cheese combined with canned chili and various seasonings or toppings such as diced onions or jalapeños for added flavor! Common cheeses used include cheddar, cream cheese, or pepper jack—each bringing its unique taste profile to this beloved appetizer dish!
Can I make Chili Cheese Dip ahead of time?
Yes! Preparing chili cheese dip ahead of time is possible: simply assemble all ingredients beforehand but avoid heating until ready for serving! Store everything covered in an airtight container inside the refrigerator; then reheat gently before serving—making entertaining easier!
How do I store leftovers?
Leftover chili cheese dip should be stored correctly within three days after cooking; transfer remaining portions into an airtight container before refrigerating! To reheat later on stovetop over low heat gradually until warmed through—adding milk if needed helps maintain creamy consistency throughout!
Is there a vegetarian version?
Absolutely! You can easily create vegetarian-friendly versions by using meatless canned chilies along with plant-based cheeses available at grocery stores nowadays—these options ensure anyone following dietary restrictions still enjoys delicious dips without sacrificing flavor!
What should I serve with Chili Cheese Dip?
Chili cheese pairs wonderfully alongside tortilla chips—but feel free getting creative by offering sliced vegetables (like bell peppers), pita bread wedges—even pretzel bites work well too! Having diverse options encourages guests exploring different tastes while enjoying any gathering together!
Can I freeze Chili Cheese Dip?
Freezing chili cheese dips may alter texture upon reheating due its creamy nature—but it’s possible! To freeze successfully first cool completely then transfer into freezer-safe containers securely sealing them shut—consume within two months ensuring best quality remains intact post-thawing process!
Conclusion
In conclusion, creating the perfect chili cheese dip requires attention to detail and careful ingredient selection. Avoid common mistakes such as using pre-shredded cheese or overcooking components; these factors play significant roles in achieving optimal flavor profiles and textures within each bite you serve guests at gatherings.
Adopting helpful tips like sautéing aromatics beforehand enhances depth while exploring variations through different types of cheeses elevates overall satisfaction levels enjoyed by everyone present around snack tables!
Furthermore, remember presentation matters too; presenting dishes attractively garnished encourages sharing experiences among friends during social events—a key aspect contributing positively towards memorable moments crafted together!
Print
Delicious Chili Cheese Dip Recipe
- Prep Time: 10 minutes
- Cook Time: 20 minutes
- Total Time: 30 minutes
- Yield: Serves 6-8
Description
Chili Cheese Dip is the ultimate party appetizer that combines rich, creamy cheese with savory chili for a flavor explosion. Perfect for game days or cozy gatherings, this dip is easy to prepare and will leave your guests craving more. Picture crispy tortilla chips dipped into a warm, gooey blend that’s customizable to your taste—add jalapeños for heat or fresh herbs for brightness. Whether enjoyed with friends or family, this crowd-pleaser is guaranteed to steal the show!
Ingredients
- – 8 ounces cream cheese (softened)
- – 2 cups sharp cheddar cheese (shredded)
- – 1 can (15 ounces) beef or turkey chili (without beans)
- – ½ cup sour cream
- – ¼ cup diced jalapeños (optional)
Instructions
1. Preheat your oven to 350°F (175°C).
2. In a large bowl, mix softened cream cheese and sour cream until smooth. Stir in half the cheddar cheese, chili, and jalapeños until well combined.
3. Transfer the mixture to an oven-safe dish and top with remaining cheddar cheese.
4. Bake for 20 minutes or until bubbly and golden on top.
5. Let cool slightly before serving with tortilla chips.
Notes
– For a vegetarian version, use meatless chili and substitute with plant-based cheeses.
– Feel free to experiment with different cheeses like pepper jack for added spiciness.
Nutrition
- Calories: 210
- Fat: 17g
- Carbohydrates: 10g
- Protein: 8g

Leave a Comment