
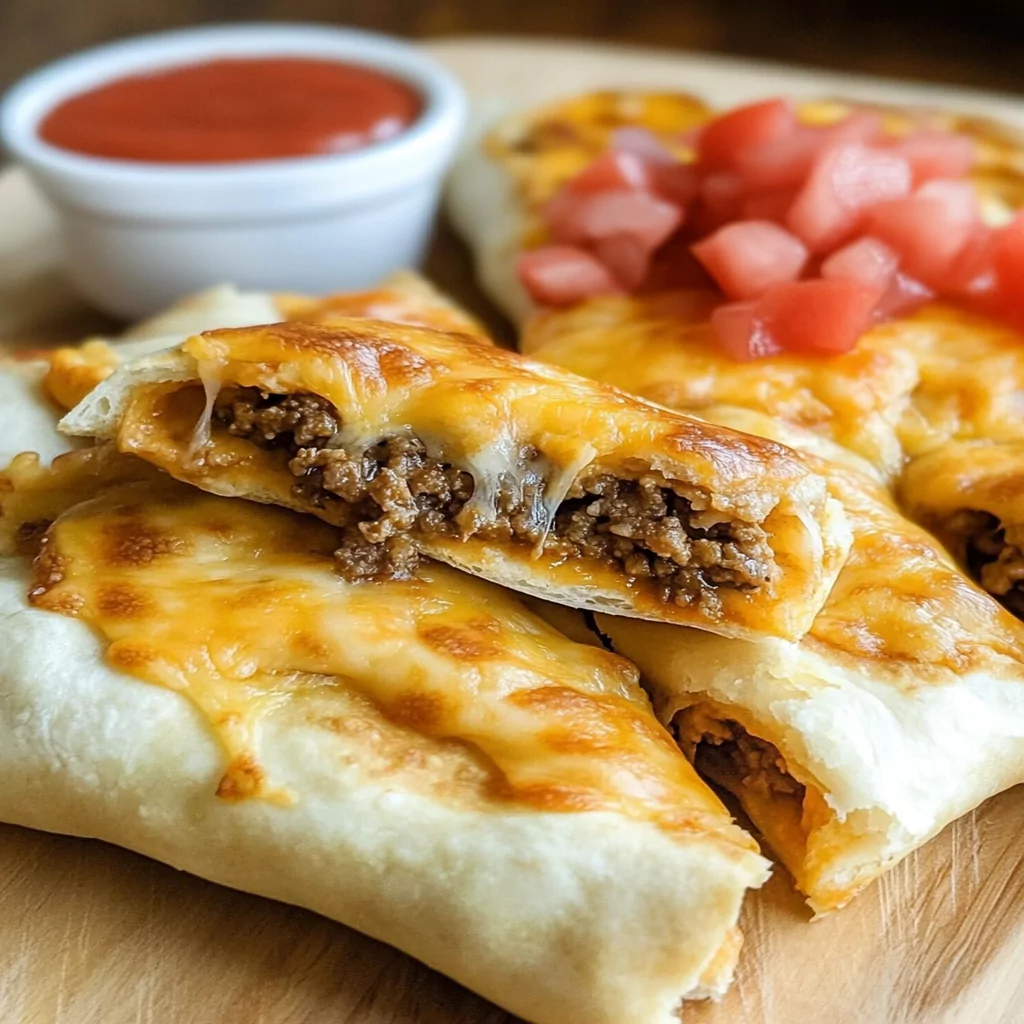
If you’re on the hunt for a fun and delicious snack that will please both kids and adults alike, look no further than Cheesy Taco Sticks. This delightful dish combines the savory flavors of seasoned ground beef with gooey cheese rolled into a crispy exterior. Whether you need an appetizer for game day or a quick meal option for busy weeknights, these cheesy taco sticks fit the bill perfectly. They are not just tasty but also incredibly versatile; you can customize them with your favorite toppings like jalapeños, sour cream, or guacamole.
In addition to being delicious, making Cheesy Taco Sticks is surprisingly easy. With just a few core ingredients and simple steps to follow, you’ll have a plateful of mouthwatering treats ready in no time. This recipe is perfect for family cooking nights or weekend gatherings where everyone can get involved in the preparation process. The best part? These taco sticks are freezer-friendly! You can make a batch ahead of time and keep them on hand for whenever the craving strikes. So roll up your sleeves and get ready to create something special that will surely become a new family favorite.
Main Ingredients
Ground Beef
For this recipe, you’ll need 1 pound of ground beef. This ingredient provides the primary protein source and serves as the flavorful foundation of your cheesy taco sticks. Choose lean ground beef (80/20) for optimal taste without too much grease. Cooking it until browned allows you to drain excess fat before combining it with spices and other ingredients. This step ensures that your filling has a rich flavor while maintaining the right texture.
Taco Seasoning
You will require 2 tablespoons of taco seasoning to infuse your beef with classic Mexican flavors. You can use store-bought seasoning or make your own by mixing chili powder, cumin, paprika, garlic powder, onion powder, salt, and pepper. The seasoning blends together beautifully with the beef and gives each bite an exciting burst of flavor that pairs perfectly with melted cheese.
Shredded Cheese
Use 1 cup of shredded cheese—sharp cheddar is ideal for its tangy flavor—but feel free to experiment with Monterey Jack or pepper jack cheese if you prefer something spicier. The gooeyness from the melted cheese adds richness to each bite of your Cheesy Taco Sticks while also helping bind everything together inside the crispy wrap.
Flour Tortillas
You will need 8 medium flour tortillas as your wrapping component. Flour tortillas are soft yet sturdy enough to hold all the delicious fillings without tearing easily during cooking or dipping into sauces later on. Their mild flavor allows them to complement the seasoned beef perfectly without overshadowing it.
Cooking Oil
Finally, prepare 1/4 cup of cooking oil (vegetable or canola). This oil is crucial for frying your cheesy taco sticks to golden perfection! It enhances the crunchiness of each stick while preventing them from sticking to your pan during cooking.

How to Prepare Cheesy Taco Sticks
Step 1: Cook the Ground Beef
Begin by heating a large skillet over medium heat and adding your 1 pound of ground beef. Use a wooden spoon or spatula to break up any clumps as it cooks. Stir frequently until all pieces turn brown—this should take about 6-8 minutes. Once browned thoroughly, drain any excess fat from the skillet before continuing onto adding your spices. Sprinkle in 2 tablespoons of taco seasoning along with 1/4 cup water; mix well until all ingredients combine seamlessly while simmering over low heat for an additional 2-3 minutes.
Step 2: Prepare Your Filling
Once the beef mixture has completed cooking time on low heat (about 10 minutes total), remove it from heat altogether so it can cool slightly before assembly begins! In this step, stir in one cup shredded cheese until melted completely through—this creates an ooey-gooey filling that everyone will love! Make sure all components blend nicely while still being warm enough not only for melting purposes but also making rolling easier later when wrapped within tortillas!
Step 3: Assemble Your Taco Sticks
Now comes one of the most fun parts—assembly! Lay out each medium flour tortilla flat onto a clean surface such as cutting board or countertop area where there’s ample space available without cluttering things up too much around you! Spoon about two tablespoons worth of prepared filling directly down middle lengthwise; try not spreading too close towards edges so they remain intact during frying process later on! Next fold sides inward overlapping slightly before rolling tightly away from you toward opposite end—making sure edges stay tucked throughout entire process as this helps maintain shape once cooked!
Step 4: Frying Time
Heat up approximately one-fourth cup worth cooking oil within large frying pan over medium-high temperature until shimmering occurs which indicates readiness! Carefully place assembled Cheesy Taco Sticks seam-side down into hot oil ensuring they don’t overcrowd pan (do batches if necessary)! Fry each side about three minutes total—flipping halfway through using tongs until golden brown comes alive visually indicating that crispiness achieved successfully!
Serving and Storing Tips
Serving Suggestions
Your delectable Cheesy Taco Sticks are best served hot straight from frying pan garnished generously alongside fresh toppings like diced tomatoes, chopped cilantro leaves & sliced avocados! Consider providing small bowls filled with salsa verde sauce alongside sour cream options so guests can customize their experience however they prefer! These additions enhance overall presentation considerably while adding extra layers upon their already rich flavors creating memorable eating experiences every single time enjoyed together amongst friends/family gatherings!
Storage Recommendations
If you happen to have leftover Cheesy Taco Sticks after hosting dinner parties—or simply want some handy snacks available anytime—you’ll want proper storage techniques in place! Allow cooled sticks rest briefly upon paper towels absorbing excess oil before transferring onto airtight containers suitable refrigeration conditions allowing them stay fresh up-to three days maximum duration safely stored away without losing taste quality significantly overall throughout period during kept chilled properly maintained according guidelines given here outlined above! Alternatively consider freezing unused portions within freezer bags where they may last several weeks longer allowing easy access whenever cravings arise unexpectedly needing quick fixes back again tempting treat options available instantly without effort required preparing anew entirely again afterward too!
Mistakes to avoid
When making Cheesy Taco Sticks, avoiding common mistakes can elevate the dish to new heights. One major pitfall is not properly seasoning the filling. The seasoning is crucial for bringing out the flavors of the cheese and taco ingredients. If you skimp on spices like cumin, chili powder, or garlic powder, your Cheesy Taco Sticks may taste bland. Always taste the mixture before filling your tortilla.
Another frequent error is overcrowding your baking sheet. When you place too many Cheesy Taco Sticks on one tray, they can steam instead of crisping up beautifully. This will result in soggy sticks rather than the desired crunchy exterior. Make sure to give each stick enough space during baking; a single layer with an inch or two between them works best.
Using low-quality tortillas can also ruin your experience. Cheap tortillas may break apart easily and fail to hold all those cheesy fillings, leading to a messy outcome. Opt for high-quality flour or corn tortillas that are durable and can withstand filling without tearing.
Lastly, neglecting the cooking time can lead to undercooked or overcooked Cheesy Taco Sticks. Every oven is different; keep an eye on your sticks as they bake, looking for a golden-brown color. Setting a timer and checking them a few minutes early can help prevent this mistake.

Tips and tricks
To master the art of making Cheesy Taco Sticks, consider these handy tips and tricks. First, prepare all your ingredients ahead of time. Having everything chopped and measured allows you to focus on assembling the sticks without rushing. This prep work also makes it easier to customize each stick according to personal preferences—add more cheese for a gooier texture or extra toppings like jalapeños for some heat.
Another useful tip is to experiment with different cheeses. While traditional cheddar works wonderfully, mixing varieties like Monterey Jack or pepper jack can enhance flavor complexity. You might even consider adding cream cheese for a richer filling. The key is to find a balance that complements the taco seasoning while providing that gooey texture everyone loves.
Utilizing an egg wash before baking can significantly improve the visual appeal of your Cheesy Taco Sticks. Brushing an egg mixture onto the tops gives them a golden sheen that makes them look irresistible when served warm from the oven.
Finally, serve your Cheesy Taco Sticks with complementary dips such as salsa, guacamole, or sour cream. These not only add flavor but also provide contrasting textures that elevate the overall eating experience.
Suggestions for Cheesy Taco Sticks
When preparing Cheesy Taco Sticks, considering variations and suggestions can lead to delightful surprises in taste and presentation. For instance, try adding black beans or corn into your filling mix for added nutrition and texture. Both ingredients pair well with classic taco flavors while giving your sticks a more hearty feel.
You could also alternate between using ground beef or shredded chicken as your protein base. Each option brings its unique flavor profile—shredded chicken tends to be lighter while ground beef offers a more robust taste that satisfies cravings.
Incorporating fresh vegetables like diced bell peppers or onions into the filling can enhance both flavor and nutrition levels further still. Sautéing them beforehand will soften their texture and deepen their flavors before they join forces with cheese in those delicious sticks.
If you’re feeling adventurous, consider experimenting with spicy sauces in your filling mix or as a topping after baking—think buffalo sauce or chipotle mayo for those who enjoy heat! This twist will undoubtedly impress anyone you serve them to at gatherings or family dinners.
Lastly, consider serving these Cheesy Taco Sticks as part of a larger spread featuring nachos or taco salads for a fun-themed meal that encourages sharing!
FAQs
What are Cheesy Taco Sticks?
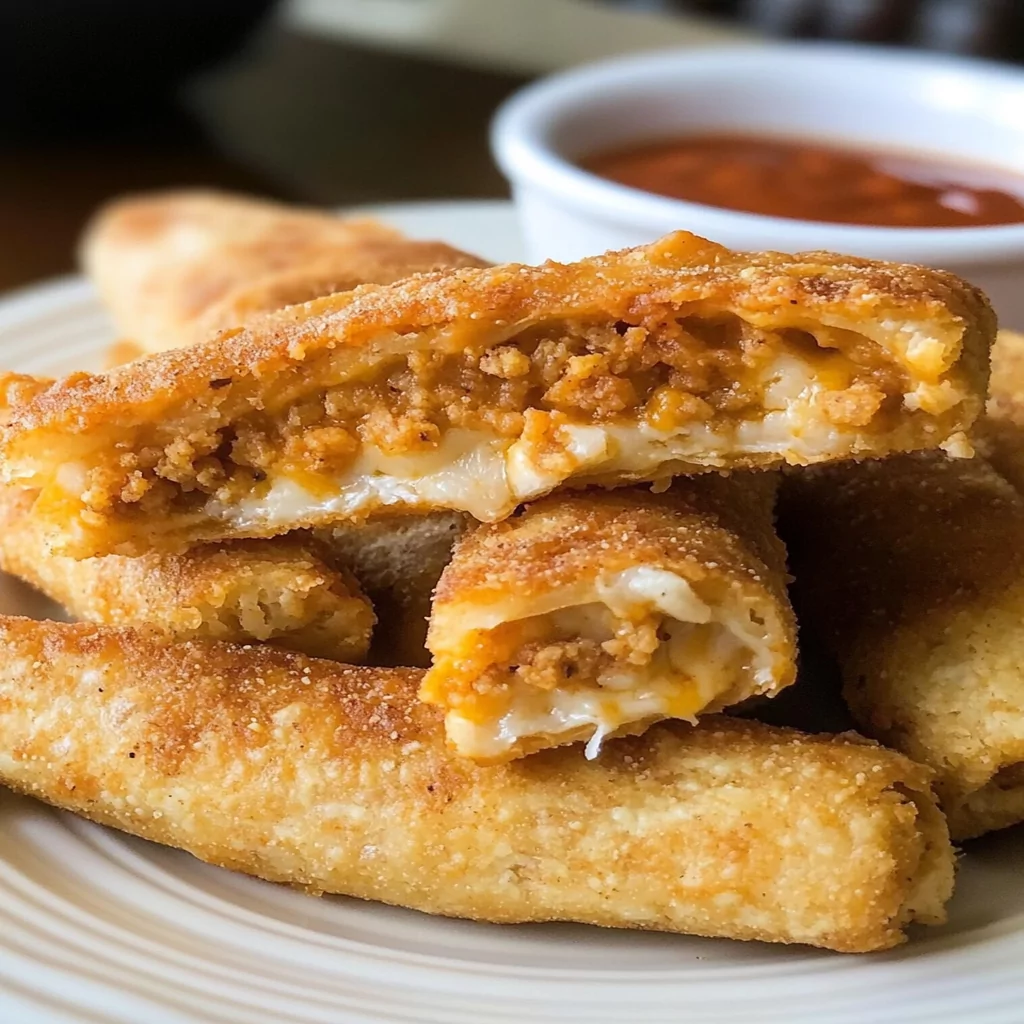
Cheesy Taco Sticks are delicious handheld snacks made from tortillas filled with seasoned meat, cheese, and various toppings before being baked until crispy and golden brown. They are perfect as appetizers at parties or quick snacks at home due to their easy preparation and delectable flavors.
How long do I bake Cheesy Taco Sticks?
Typically, you should bake Cheesy Taco Sticks at 400°F (200°C) for about 15-20 minutes until they turn golden brown and crispy on the outside. However, cooking times may vary based on individual ovens; always check periodically to ensure they don’t overcook.
Can I make Cheesy Taco Sticks ahead of time?
Yes! You can prepare Cheesy Taco Sticks ahead of time by assembling them fully and then refrigerating them until you’re ready to bake. Just remember that if they sit too long before cooking, moisture might seep into the tortillas; therefore it’s best consumed within a few hours after assembly.
What kind of dipping sauces pair well with Cheesy Taco Sticks?
Several dipping sauces complement Cheesy Taco Sticks beautifully! Popular choices include salsa (mild or spicy), guacamole for creaminess, sour cream for tanginess, or even chipotle ranch dressing for those who appreciate smoky flavors—all enhance enjoyment when paired together!
Can I freeze leftover Cheesy Taco Sticks?
Absolutely! If you have leftover Cheesy Taco Sticks, allow them to cool completely first before freezing them in airtight containers or freezer bags to maintain freshness longer term—reheat in an oven when desired!
Are there vegetarian options available for Cheesy Taco Sticks?
Definitely! You can create vegetarian-friendly versions by substituting meat with plant-based proteins such as lentils or black beans mixed with plenty of cheese along with veggies like spinach or zucchini—making these deliciously cheesy yet meatless options!
Conclusion
In conclusion, mastering the art of creating perfect Cheesy Taco Sticks requires attention to detail while avoiding common pitfalls like poor seasoning and overcrowding during baking times. By following essential tips—such as prepping ingredients beforehand—you’ll streamline your process while discovering exciting variations along the way!
Additionally, enhancing your dish through thoughtful pairing options makes it even more enjoyable whether serving at parties or enjoying family dinners at home together! With proper storage techniques allowing leftovers longevity plus ensuring vegetarian alternatives exist too—it’s clear why these tasty snacks have earned their place among beloved culinary favorites!
Print
Cheesy Taco Sticks Recipe for Family Fun
- Prep Time: 15
- Cook Time: 12
- Total Time: 27 minutes
Description
Crispy on the outside, gooey on the inside—Cheesy Taco Sticks are the perfect snack or appetizer! Packed with seasoned beef and melted cheese, these sticks are wrapped in soft tortillas and fried to golden perfection.
Ingredients
- Ground Beef: 1 lb (lean 80/20 preferred)
- Taco Seasoning: 2 tbsp
- Shredded Cheese: 1 cup (cheddar or Monterey Jack)
- Flour Tortillas: 8 medium-sized
- Cooking Oil: ¼ cup (vegetable or canola)
Instructions
- Cook Beef: Brown ground beef in a skillet, drain excess fat, and mix with taco seasoning and water. Simmer for 2-3 minutes.
- Prepare Filling: Stir shredded cheese into the cooked beef until melted. Let cool slightly.
- Assemble Sticks: Spoon 2 tablespoons of filling onto each tortilla, fold sides inward, and roll tightly.
- Fry: Heat oil in a pan, fry sticks seam-side down until golden brown (about 3 minutes per side).
Notes
- For extra crunch, brush tortillas with oil before frying.
- Serve with dips like salsa, guacamole, or sour cream for added flavor.
- These taco sticks can be baked at 375°F (190°C) for a healthier option—bake for 10-12 minutes.

Leave a Comment